
Yay for fixing your own board!
We designed the Moonlander to be serviceable in the field. No glue or speciality screws. All you need are simple tools and some patience.
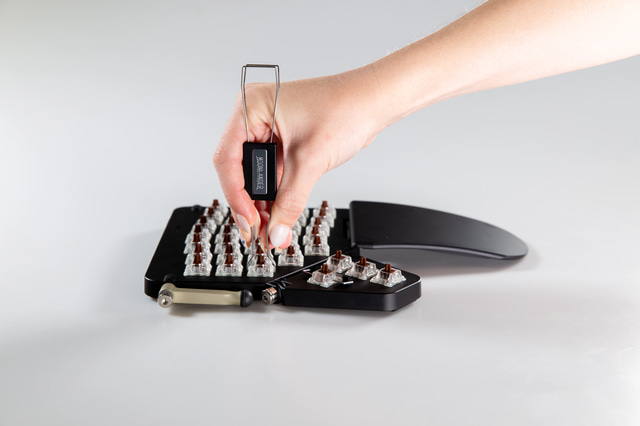
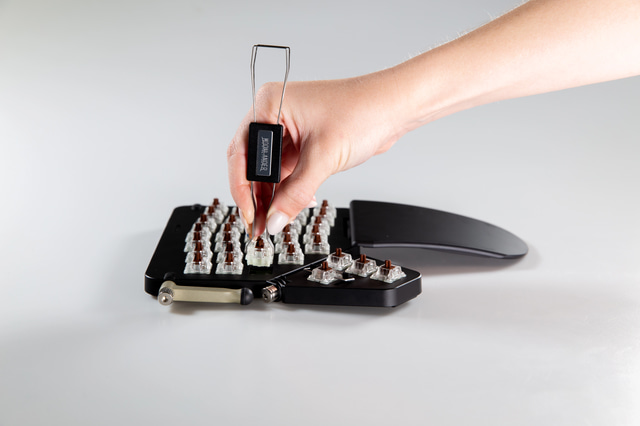
Removing keycaps
Lay the keyboard completely flat on your desk before proceeding, as you will be applying moderate pressure to the unit. Use the included keypuller to remove the caps.
- Use the "wire loop" side of the key puller.
- Place the puller over the keycap and push down.
- The wires will part and "hug" the keycap from below.
- Pull directly up, gently but firmly.
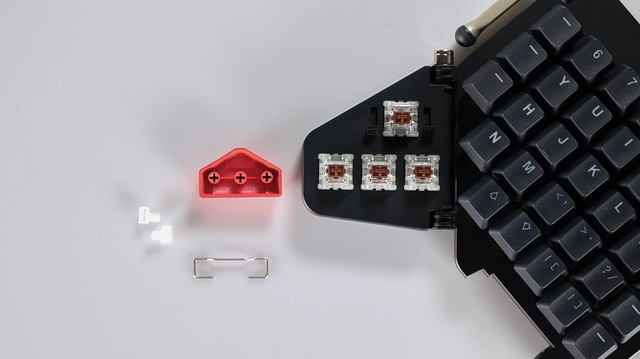
Removing the costar stabilizer
The Launch keys come with a Costar stabilizer (a metal wire) installed by default. You don't necessarily need this stabilizer: Many people prefer to use the board without it. Fortunately, it is easy to remove.
- Pull the Launch key up gently so it comes off the switch but is still hooked on the stabilizer bar. You can use the tool for this, or just your fingers since it is a larger keycap.
- Slide the keycap all the way to one end of the bar which should give you just enough room to unhook the keycap from the opposite end of the bar.
- Slide the keycap back to remove it from the other side of the bar.
- Remove the keycap and gently pull the bar out as parallel as possible to the surface of the thumb cluster.
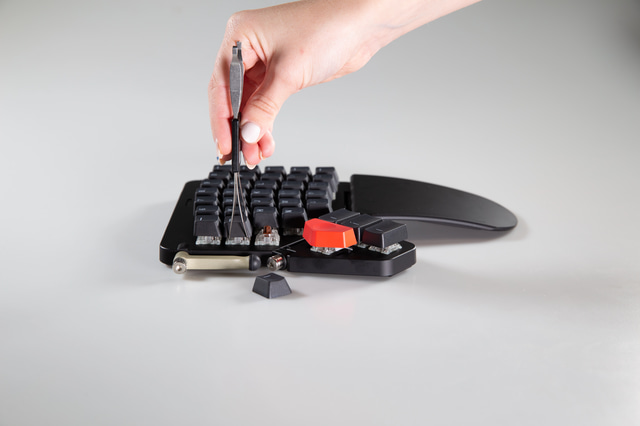
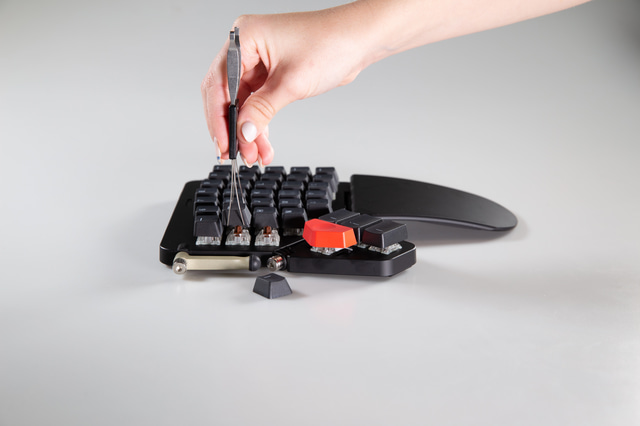
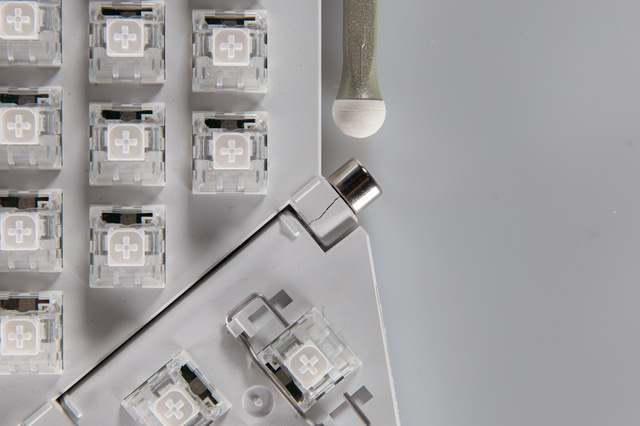
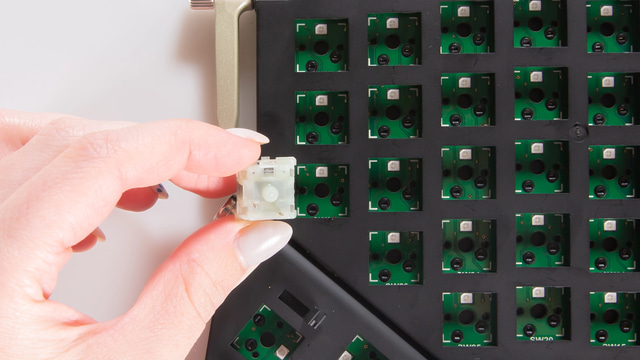
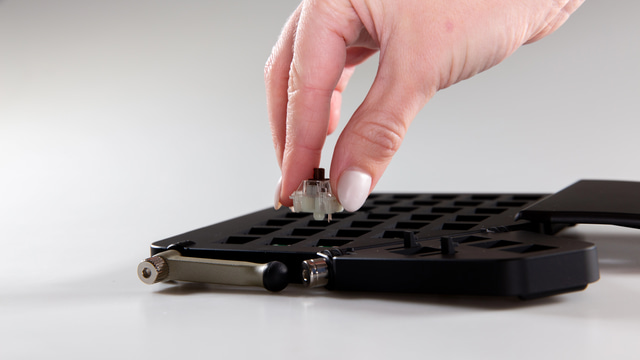
Removing keyswitches
Orientation matters when removing a keyswitch. Make sure you grab the switch from the top and bottom, as shown.
- Use the "tweezers" side of the keypuller.
- Insert the tweezers under the switch where you see the little tabs.
- When removing switches, you should try to insert the puller between the top case of the board and the switch. Start by positioning the key puller vertically. If you're having trouble that way, try positioning it horizontally.
- Squeeze the tweezers around the switch. Watch the tabs press in.
- Pull up with a smooth upward motion. The keyswitch will come out - victory!
- If you've installed 5-pin switches, you may need a little more force to remove them. Just make sure you have a good grip and pull straight up.
Removing the wing or stub
Changing the Wing requires it to be in a specific orientation.
- Rotate the Wing towards the back of the board.
- Push the Wing towards the thumb cluster.
- Gently pull out the outermost side of the Wing away from the board, it should come away easily.
- Remove the innermost side by pulling away.
To remove the Stub, simply push it in the direction shown ("into" the spring), then gently pop it out. Simple!
Installing the wing or stub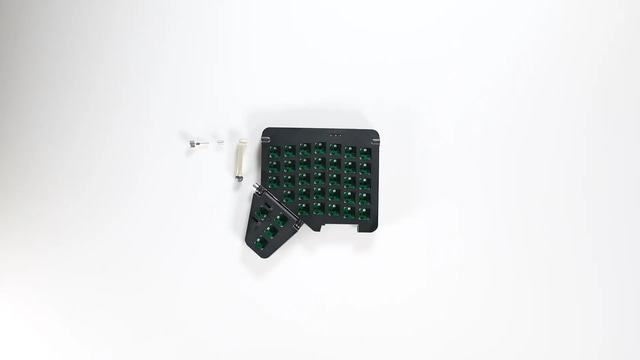
Removing the legs
The metal legs on both sides are right to tighten, and left to loosen. Clockwise to tighten, counterclockwise (or anticlockwise) to loosen.
Use your fingers, rather than a screwdriver or hex wrench.
Be sure not to lose the inner spring.
- You're going to want to loosen the legs when repositioning them, too. Loosen, reposition, then lock back down.
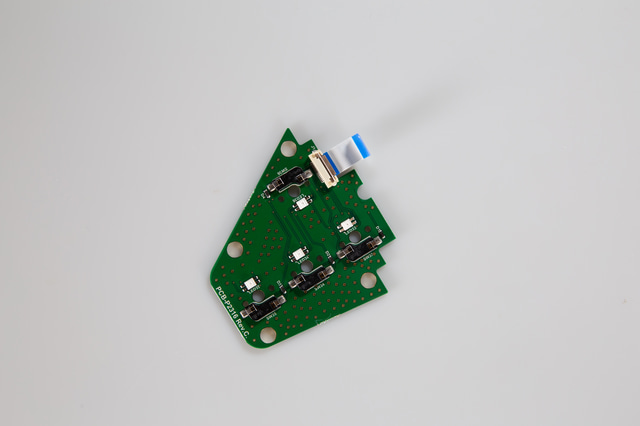
Removing the thumb cluster ribbon cable
Note: This part is delicate. Be careful.
- Pull back the soft tab covering the ribbon cable that connects the thumb cluster to the main body of the Moonlander.
- Gently flip up the little brown tab that secures the ribbon cable to the Moonlander main body. You can use a small flathead screwdriver or your fingernail. Be sure to flip the tab up from the center rather than off to either side. This will help make sure it doesn't break.
- Remove the ribbon cable. You may be able to do this with your fingers, but it's easier to use a small set of tweezers. Just apply gentle force from underneath the cable and it will slide out. Applying force to both sides can help ensure it comes out smoothly.


Removing the thumb cluster
Top thumb screw:
The left side loosens right (clockwise). Turn it left (counterclockwise) to tighten.The right side loosens left (counterclockwise), like a standard screw. Turn it right (clockwise) to tighten.
Bottom screw:
Use a small (2.5mm) hex bit to unscrew. You will reach a point where turning the screw does not back it out anymore, but the screw will still be in the socket. Use a pair of pliers or your fingers to grab the head of the screw and pull it out - this should not require force if the screw is fully unscrewed..webp)
Note:
Not only is the threading opposite on the main thumb cluster screws, but the diameter of the screws is different (2.5mm). Make note of that. The screw for the right side is marked with a narrow line. This change applies to all units shipped since circa March 2022. Earlier units do not have this marking, so make sure to differentiate the screws in a different way so you don't mix them up!
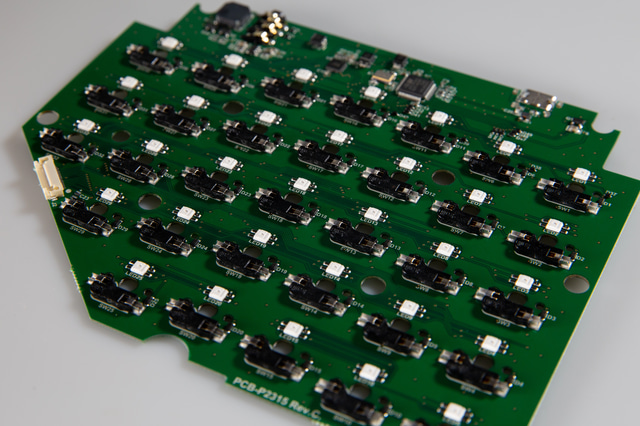
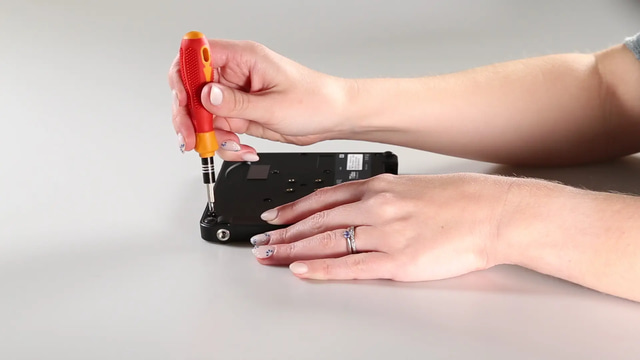
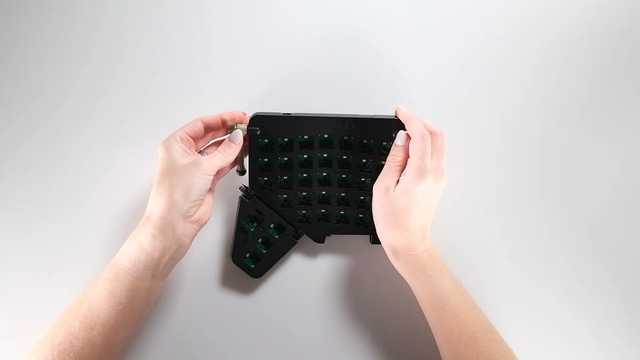
Removing the main PCB
The main housing is held together by standard Phillips screws. Note there are no clips or glue.
- Before you begin, make sure you've removed all keycaps and keyswitches. See removing keycaps, and removing keyswitches.
- Remove all screws.
- Remove rear cover, exposing the PCB.
- Gently push the PCB from below to remove.
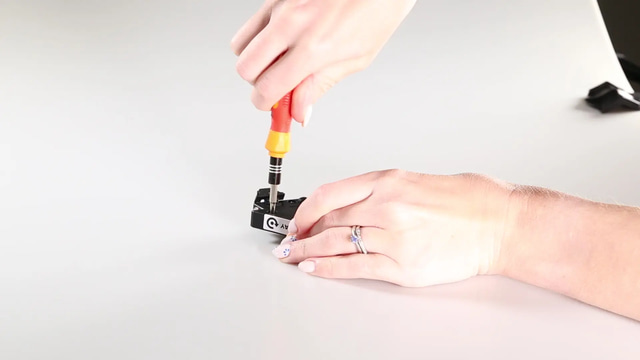
Removing the thumb cluster PCB
The main housing is held together by standard Phillips screws. Note there are no clips or glue.
- Before you begin, make sure you've removed all keycaps and keyswitches. See removing keycaps, and removing keyswitches.
- Remove all screws.
- Remove main part rear cover, exposing the PCB.
- Gently push the PCB from below to remove.
Putting it back together
Don't let this happen to you
It is absolutely possible to over-tighten the thumb cluster screw and break the plastic.
Only use the included Hex key for tightening this part, and be gentle. Metal is stronger than plastic, and you can crush the housing quite easily.

Installing the main PCB
Slide the PCB into the top half of the housing, observing orientation. Make sure it's nice and flat.
Then pop on the bottom part of the housing and gently tighten all screws.
When you're done, nothing should rattle. Just like new!
Remove the main PCB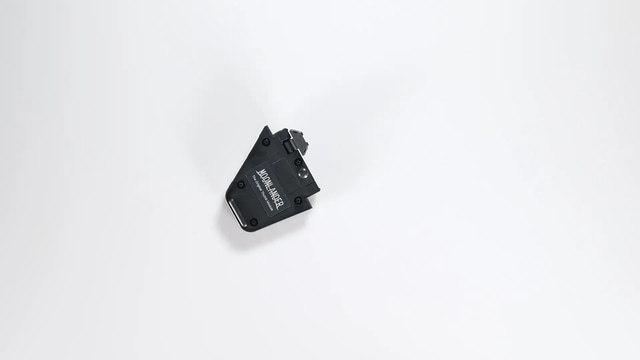
Installing the thumb cluster PCB
Same deal as installing the main PCB, just smaller. Drop the PCB into the top half of the housing, observing orientation. Make sure it's nice and flat.
Then pop on the bottom part of the housing and gently tighten all screws.
When you're done, nothing should rattle. Just like new!
Remove thumb cluster PCB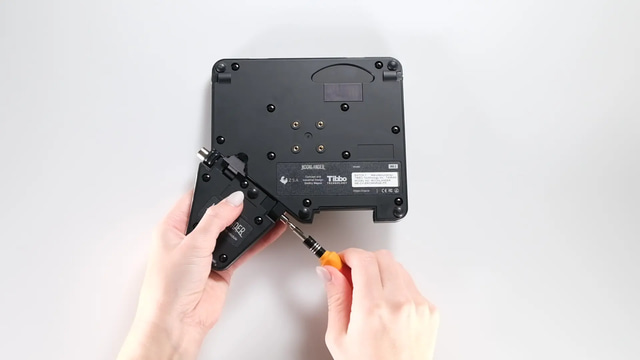

Reattaching the thumb cluster
This step is just for the mechanical connection — once you attach the thumb cluster mechanically, the next step shows you what to do with the ribbon cable (the electronic connection).
Push the small hinge screw into its socket. Once you feel that it can't be pushed in anymore, begin screwing it in. Use a screwdriver or small hex key for this (not the hex key that came with the board). Be gentle.
Reinsert the spring and large thumb cluster screw and screw them back in.
Note that you can definitely break your board in this step. See our warning above.
Remove the thumb clusterv2.webp)
Note: This part is delicate. Be careful.
When re-attaching the thumb cluster, be mindful of the correct rotation direction of the screw (again), and more importantly, take your time lining up the threads. If you don't line it up completely precisely, the screw may not bite, or worse still — it may become lodged in there. If you feel it's getting stuck before it's fully in, stop, unscrew, re-align, and try again. Also be extra-sure you actually have the right screw for the side you are working on. As noted above, they are different — not just in threading direction, but also in diameter.
Reattaching the ribbon cable
- With both screws in, make sure the ribbon cable lines up with its socket.
- Grab the ribbon cable and pinch the blue connector to the white cable for a few seconds. When you let the cable go, it should be angled more downwards which will help you reinsert it.
- Maneuver the ribbon cable so that it starts to slide underneath the two lower tiny white colored tabs of the connector. This may take a few tries. If the connector goes in at an incorrect angle in or only one half gets underneath the tabs, simply pull it back out and try again. You should be able to guide it with your finger.
- Once the cable is inserted straight on, use some tweezers or a flat-head screwdriver to finish pushing it in. The blue part of the cable is rigid, so you can press against the back of it, but be gentle. The cable should slide in easily.
- Flip the brown tab back down to secure the cable. Again, be gentle.
- Replace the soft cover of the ribbon cable.
Attaching the legs
Both sides are right to tighten, and left to loosen. Clockwise to tighten, counterclockwise (or anticlockwise) to loosen.
Thread the screw through the leg, making sure the teeth of the leg are pointed inwards towards the keyboard (not the screw head). Then add the spring.
Finally, use your fingers to tighten the screw — not a hex key or a screwdriver.
Removing the legsInstalling the Wing or Stub
Get the orientation right for the Wing:
- Rotate the Wing towards the back of the board.
- Insert the long end of the rod into its socket.
- Push in, and then put the short end of the rod into the socket on the other side.
Installing keyswitches
Orientation matters when installing a keyswitch:
- Look at the pins on the switch, and look at the socket. Make sure they line up correctly, not upside-down.
- Put the switch over the socket, directly vertically (not at an angle).
- Gently press down until you hear/feel it click into place. This shouldn't take much force.
If you mess it up and get a bent pin, remove the switch, gently straighten the pin, and try again.
Removing keyswitchesInstalling the stabilizer
The metal bar will need to be hooked into both keycap inserts. It's easiest to hook one side in first, then the other.
Note the orientation of the bar here: the "notch" should be towards the inside of the keycap when the bar is flipped towards the back of the keycap. This is so that the sides of the bar can clip into the plastic stabilizer clips on your keyboard. Line the keycap up with your keyswitch, and with the metal bar flipped towards the back of the key, gently push the keycap onto the keyswitch. You can tap a couple times to make sure it's on securely.
Now, using your fingernail or a flat screwdriver, just gently push the back of the metal bar into the plastic clips. It's easier to do this one at a time. If it doesn't seem to fit, check the orientation of the metal bar.
Removing the stabilizerInstalling keycaps
Simply press the keycap down onto the switch, from the top. Do this with the keyboard unplugged, so you don't end up sending a bunch of random keystrokes to your computer.
Removing the keycaps