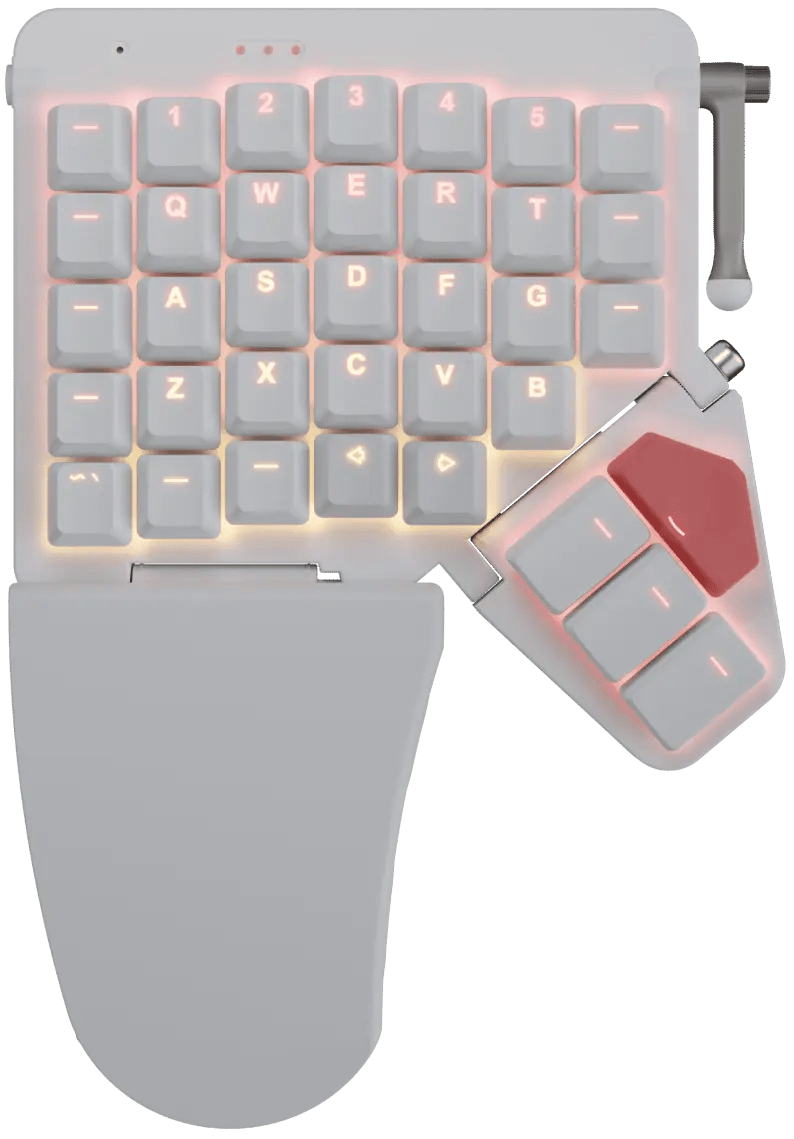
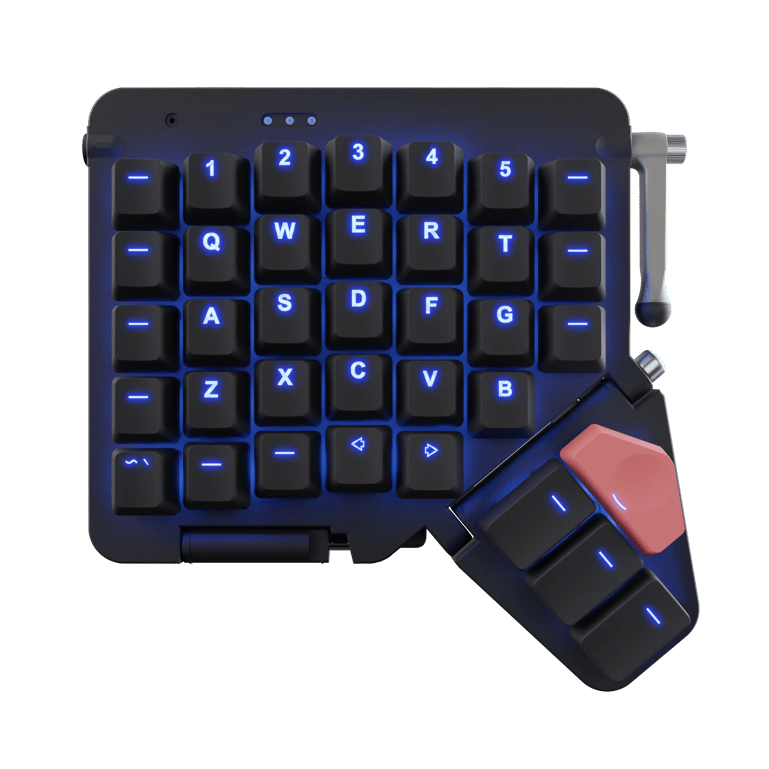
Introducing Moonlander Mark I
A next-generation ergonomic keyboard
Portable: carrying case included.
Modular: Remove or swap any part.
Fully backlit: RGB LEDs with smart animations.
Mechanical: Good old-fashioned keyswitches.
Gamer-friendly: Left side can fly solo.
Built to last: Two-year warranty. No fine print.
"I've spent a lot of time with many ergonomic keyboards, but ZSA's Moonlander Mark I may be my favorite one I've ever used"
Celebrating 58,000 Moonlanders


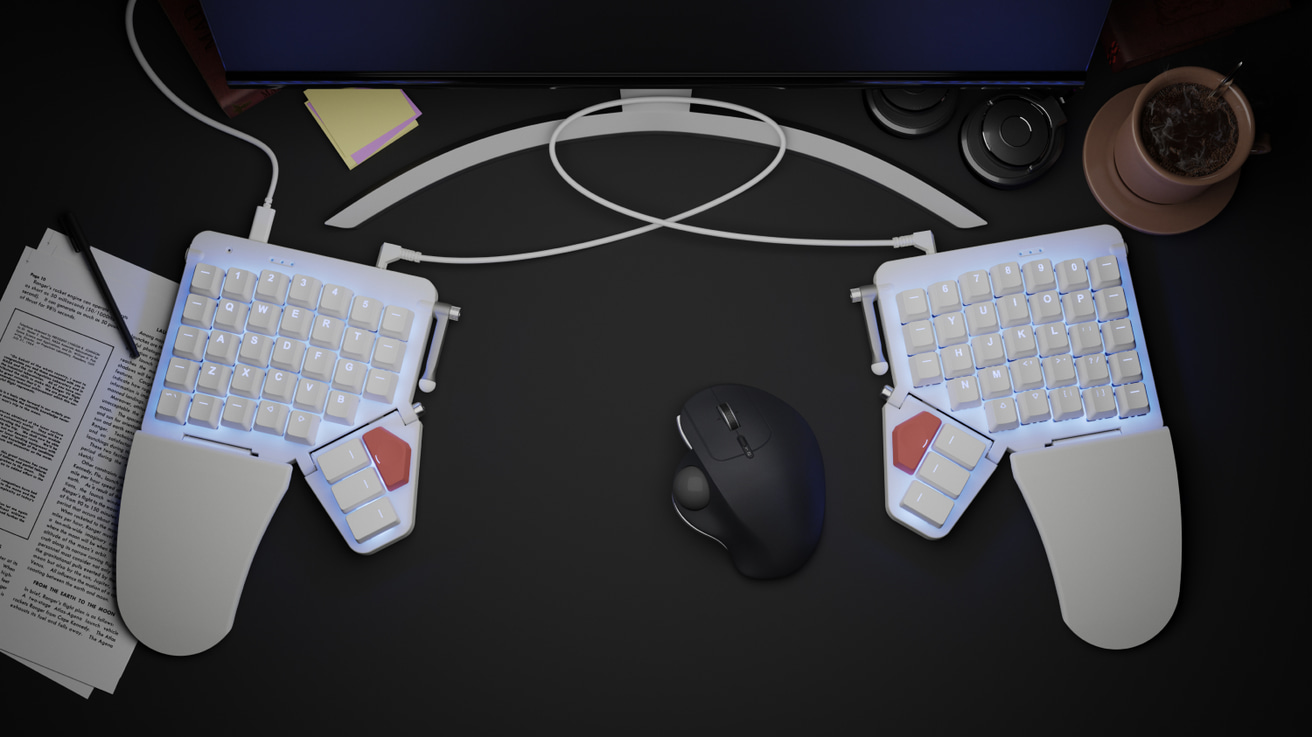
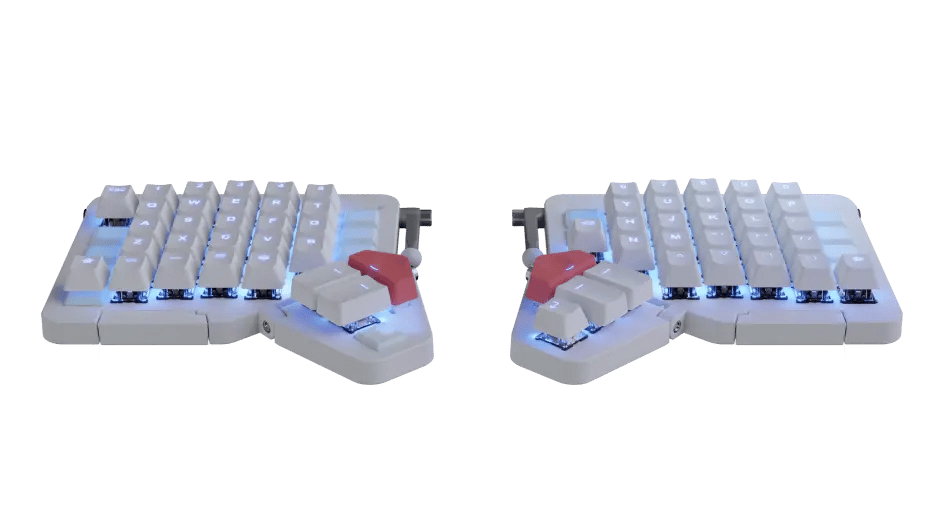
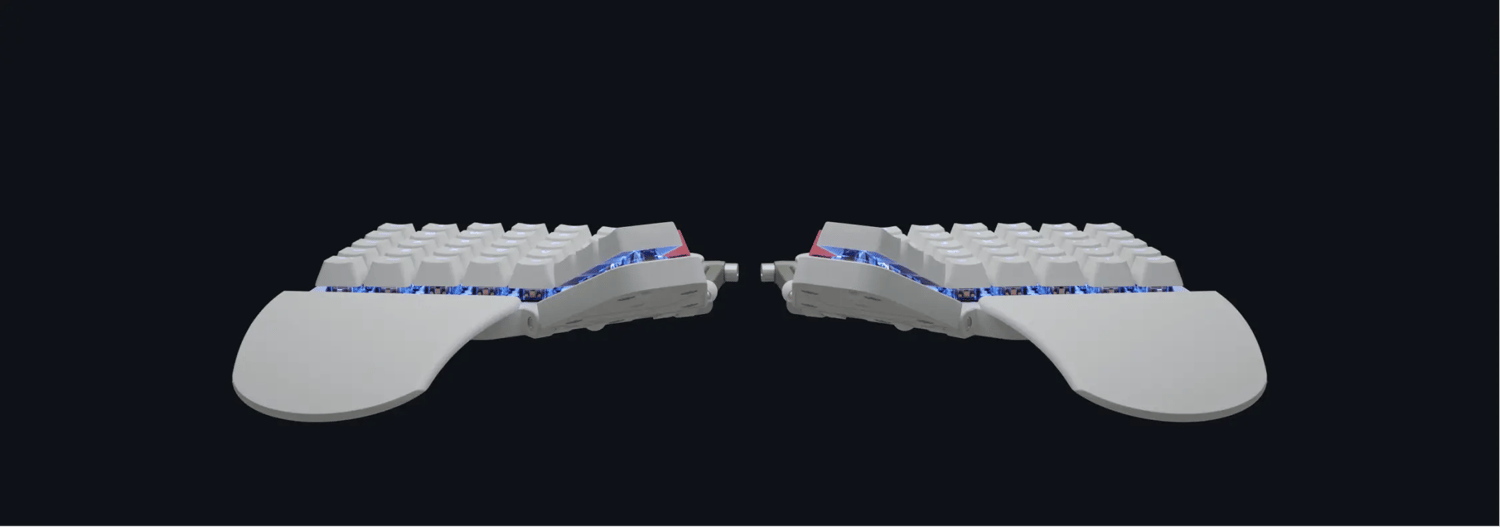
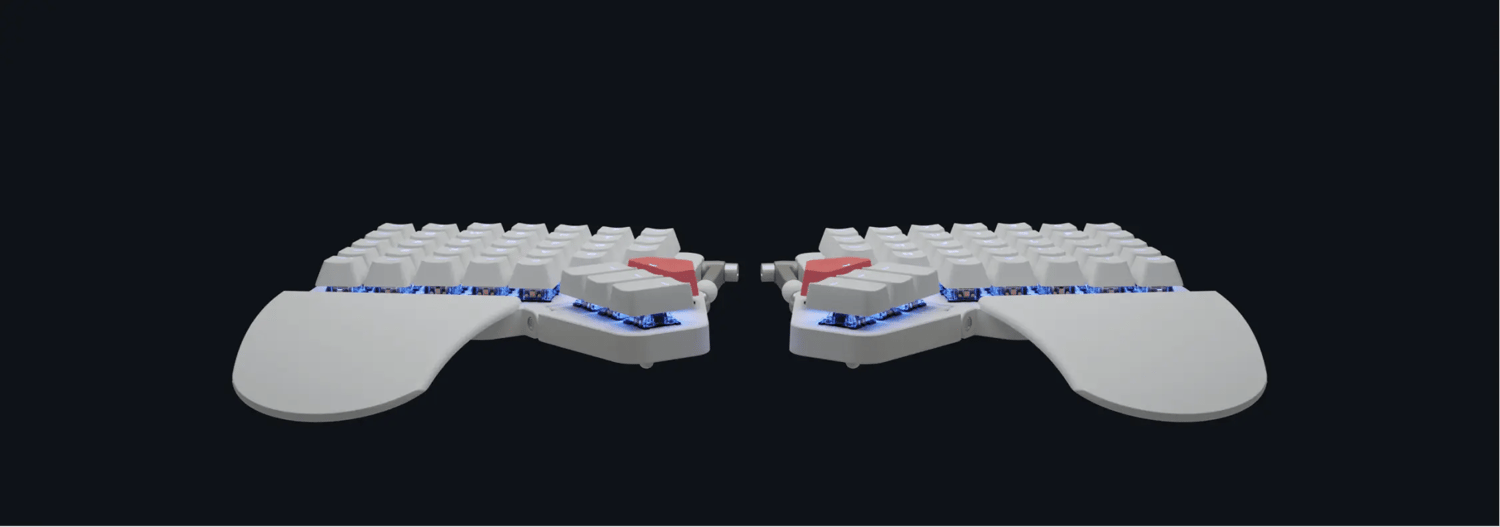
Two Halves
Place each half exactly where you need it. Typing at shoulder width keeps your chest open, which leads to a more relaxed posture.
No more hunching over the keyboard.
Comes from a great family
We've been making high-end keyboards since 2015.
Here's our lineup.
Ultimate portability. Ergonomics, anywhere.
Learn MoreFeatures an articulating thumb cluster. Over 40,000 units sold.
Customize yoursOur first keyboard, going strong for years. An ergonomic classic with a big community.
Learn MoreCONNECT THE

Add mousing superpowers to your Moonlander
Trackball and trackpad modules available now
Learn more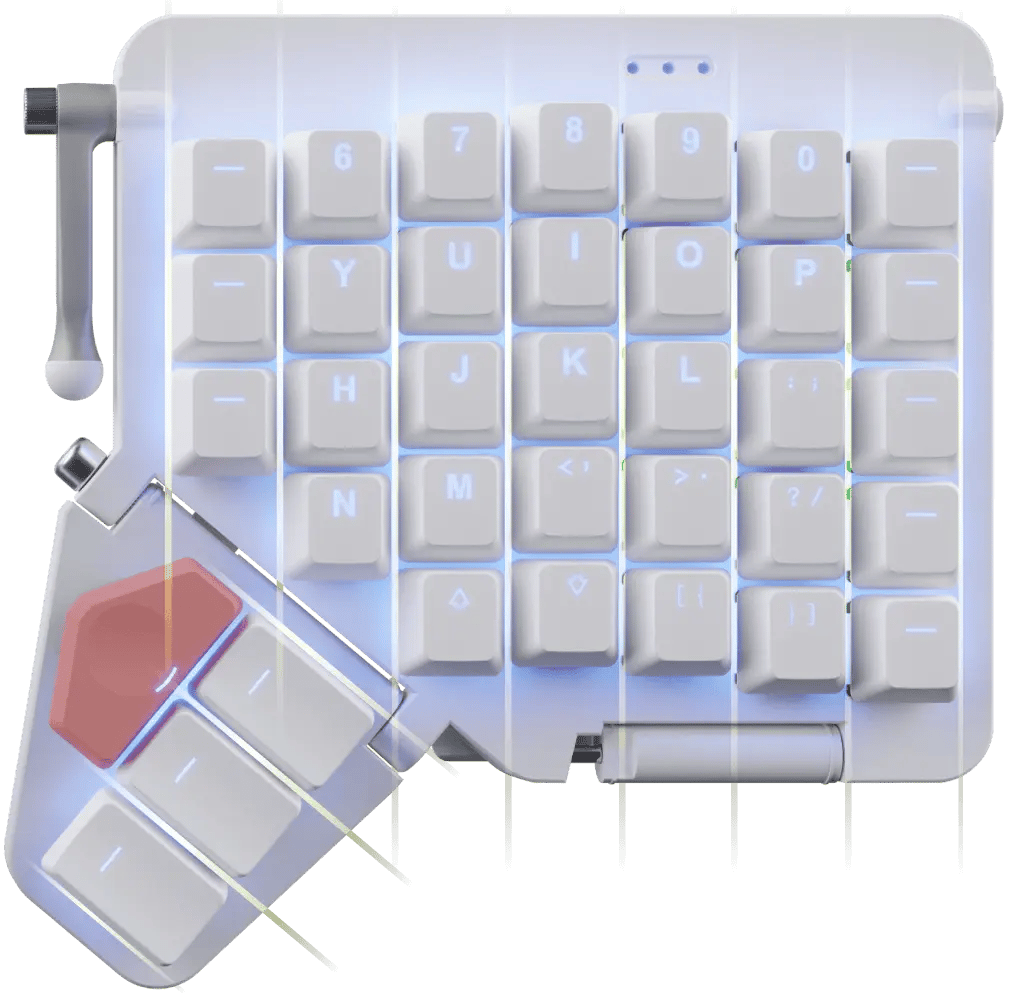
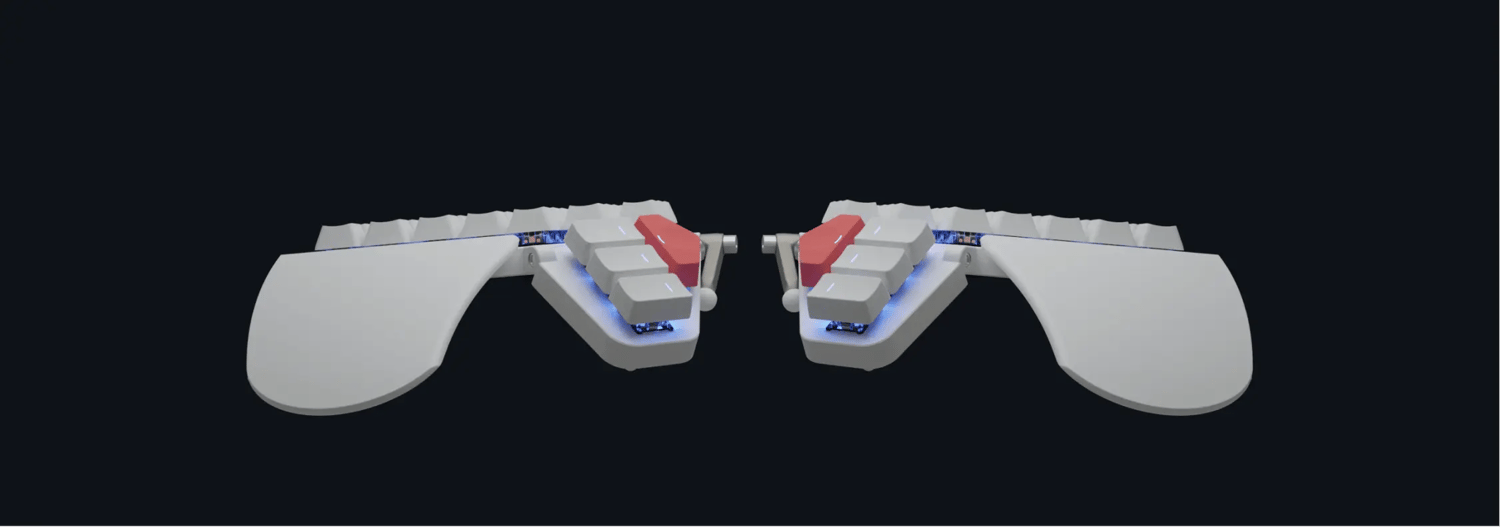
Columnar
Because when you extend a finger, it doesn‘t go sideways.
Columnar keyboards like the ErgoDox EZ and the Moonlander make it easier to reach above and below the home row. Stretch less, type more.
Spaces
Real people, in a real workspace, that happen to use one of our keyboards.

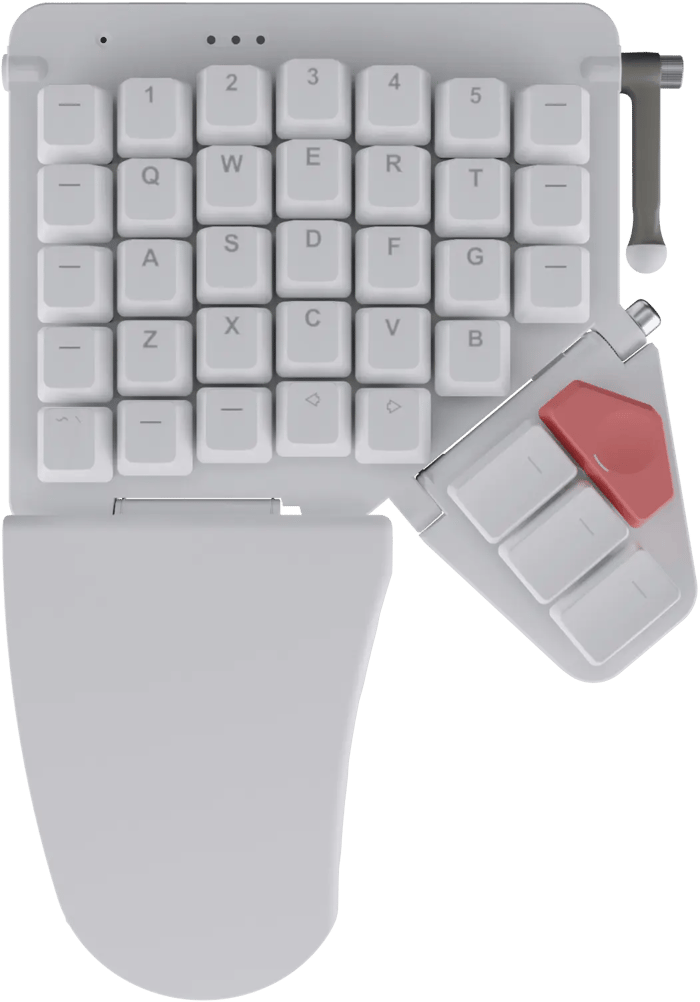
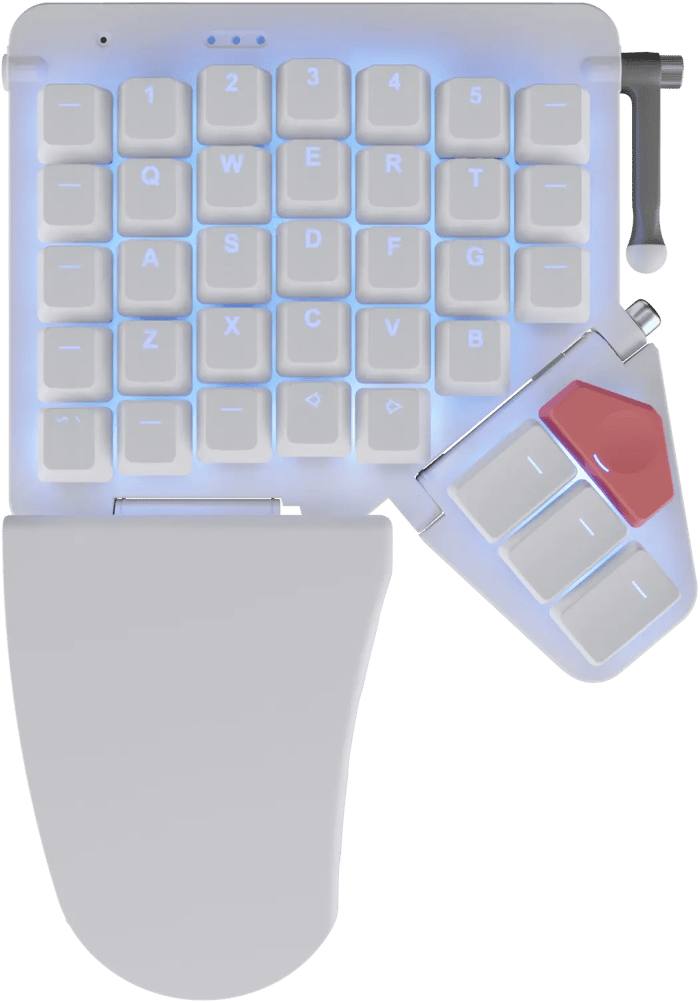
Active left side
The Moonlander has its USB Type-C connector on the left side, so you can use that side on its own.
When it‘s time to get your game on, unplug the right side and give your mouse some room to roam. The left side acts as a powerful macro pad.
The Platform
An optional tenting accessory like no other: All-metal, slides, locks, and folds in seconds.
The Platform's sophisticated latching system allows you to quickly disengage it and stow it away, flat, along with the Moonlander in the Moonlander's carrying case.
More about The Platform
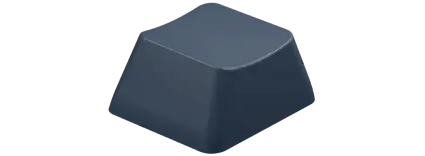
Blank or printed
The Moonlander comes with high-quality keycaps made of doubleshot PBT plastic. You can get them either with letters ("printed"), or just lines for the light to shine through ("blank").
The printed keycaps are all the same profile so you can use them as-is or move them around for different non-QWERTY layouts.
The blank keycaps are sculpted, so each row has a different profile for added typing comfort.
When in doubt, go with the printed caps; they're easier to start with.
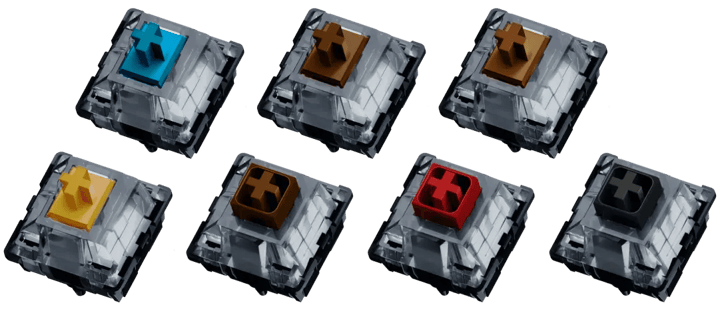
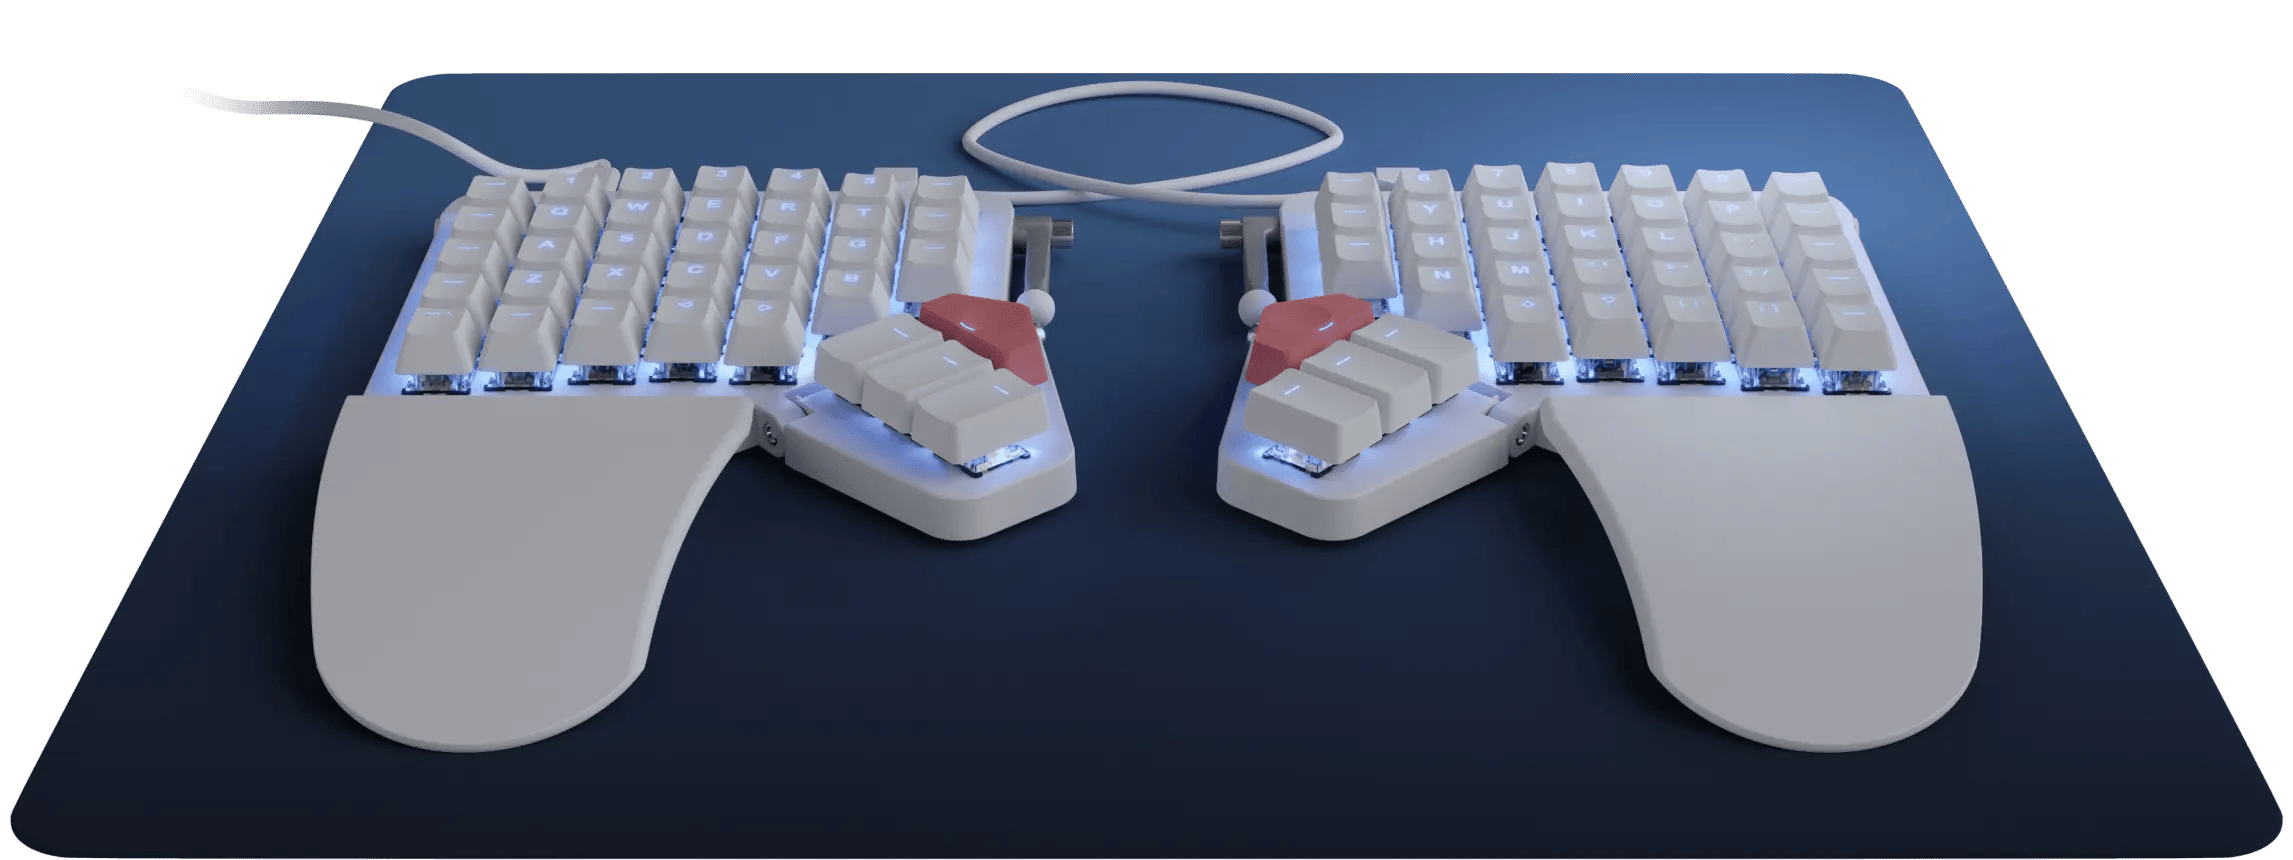
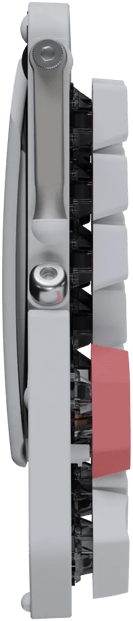
Mechanical
In a mechanical keyboard, each keypress is crisp and distinct. Different keyswitches offer a dramatically different typing feel.
When building out your new Moonlander, choose between ten different types of switches. If you're not sure which is right for you, we'll help you choose.
See the keyswitchesWant to dive deeper into the world of keyswitches? Listen to Tisha talk about switches!

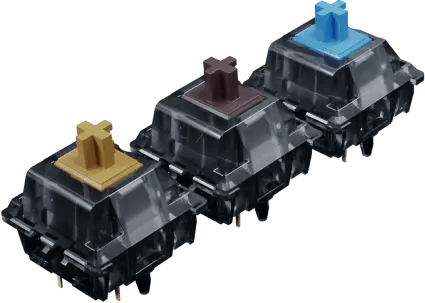
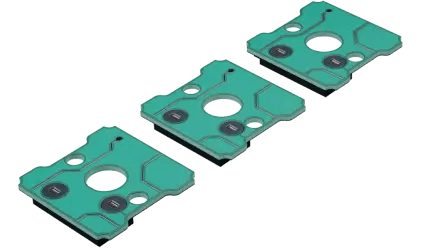
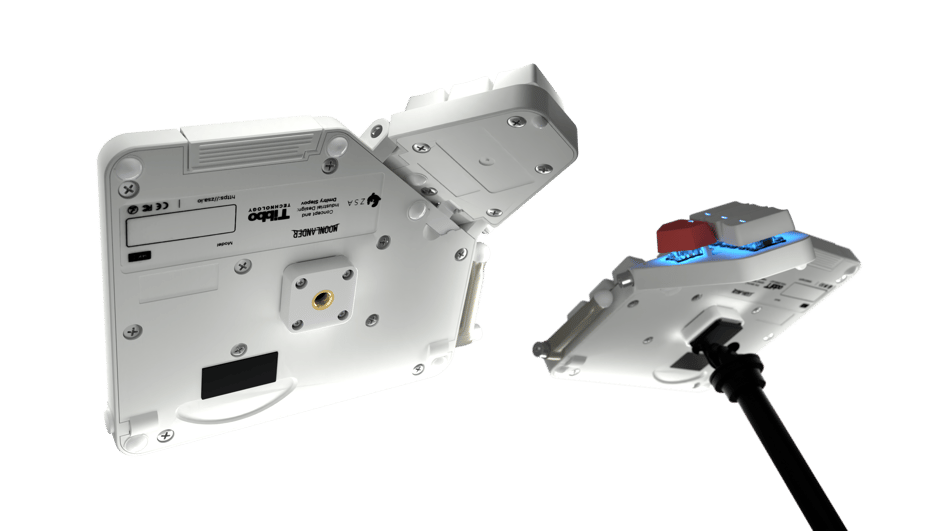
Hot-swappable
Change any keyswitch on your Moonlander at any time, without soldering and without voiding your warranty. Every unit ships with a free tool that makes this easy.
Your keyboard, your switches, your way.
Change it yourself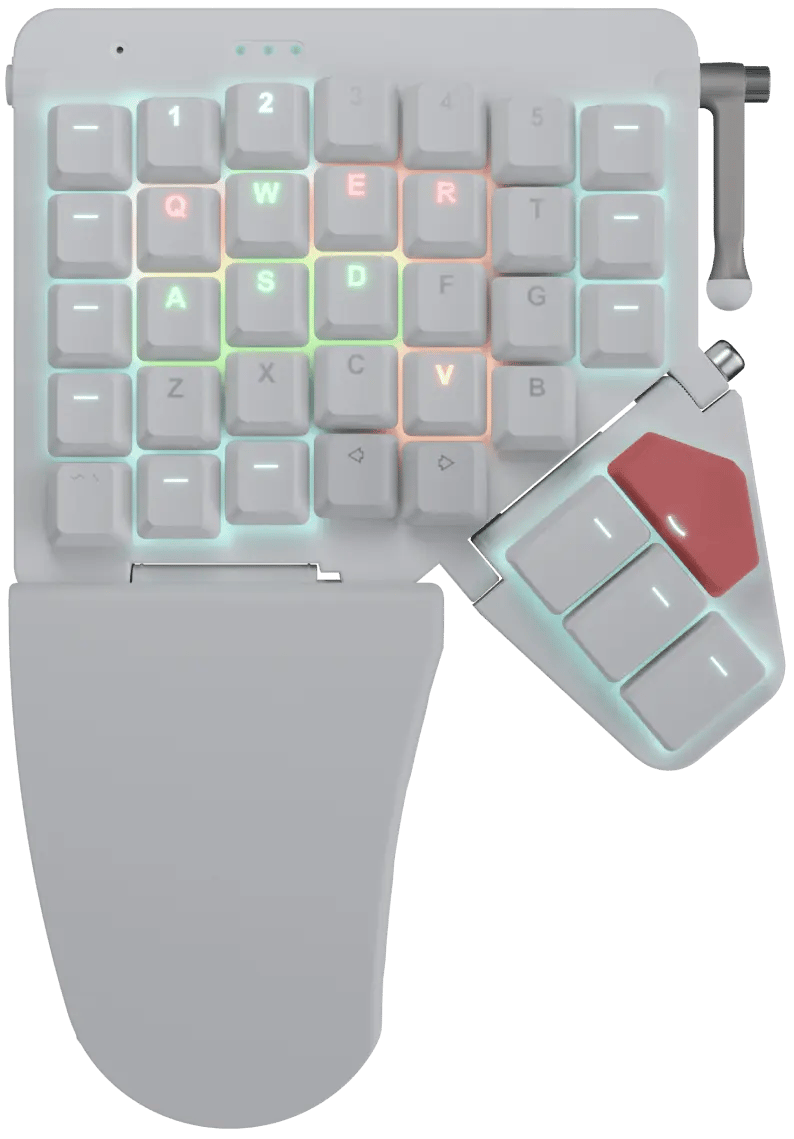

Fully backlit forPhotoshopWriting
The Moonlander is fully backlit, with programmable RGB LEDs under each key.
Use them to light up the active keys on your current layer, remember shortcuts, and more.
Switch to Photoshop, and the "Photoshop" layer on your ZSA keyboard automatically activates. Click into Fortnite, and now your "Game" layer is suddenly active.
See Smart LayersLots of other powerful firmware features ↓


Lots of LED animations
While the Moonlander excels at the ergonomics of productivity, it also knows how to party. For those of you who enjoy watching LEDs dance, we made a little video showcasing some of the Mooonlander’s moves.
Blinks and beeps
on command
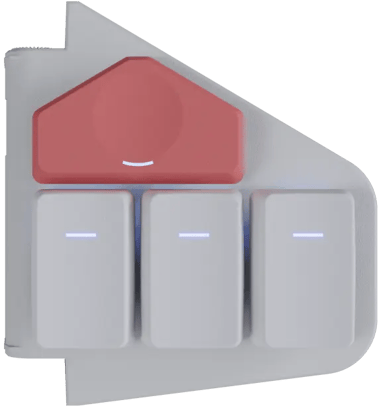
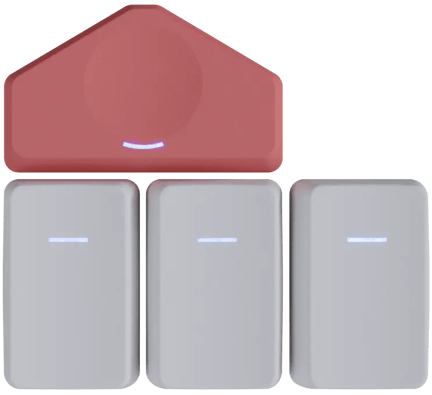
The Moonlander comes with three status LEDs on each side and a buzzer for audio output. Get visual and audible feedback as you work, or not (you choose).
Comes with great tools
Free, industry-leading software to make it easier to master and customize your keyboard.
Oryx
It’s your keyboard: Set it up just the way you want it. You can play with the full version of Oryx right now, even before buying a ZSA keyboard.
Try it outKeymapp
See your layout update on your screen as you type. Remember where your keys are without straining your neck. Entirely optional; your layout is always saved to the keyboard itself.
Read Moretyp.ing
Practice your custom layout until it becomes second nature. Includes modes to focus on standard text, numbers and symbols, programming syntax, and unlabeled keys within layers.
See howSee your layout in real time
Our native app, Keymapp, displays your entire layout right in front of you. It updates as you use your board, so you'll never get lost while navigating layers. Pin Keymapp to the corner of your screen and you'll always know what each key does at a glance, even while working in other windows.
Keymapp's "heatmap" feature gives you personalized, always-local data about which keys you use most to help optimize your layout for your own particular workload.
Most important, Keymapp is entirely optional. Take your keyboard from one computer to another and all your customizations come with you — not locked in an app sitting in your system tray.
See what's possible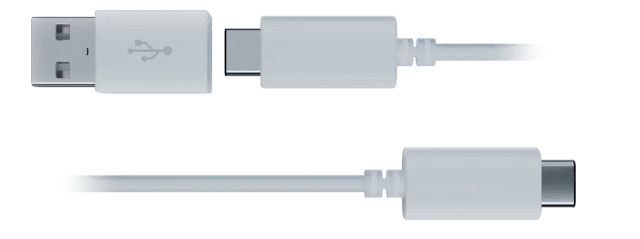
USB Type-C
The Moonlander comes with a detachable USB Type-C cable as well as a C-to-A dongle in the box.
Slim
The Moonlander‘s keycaps float on top of the board, for an exposed, clean look. It‘s one of the thinnest mechanical keyboards out there.
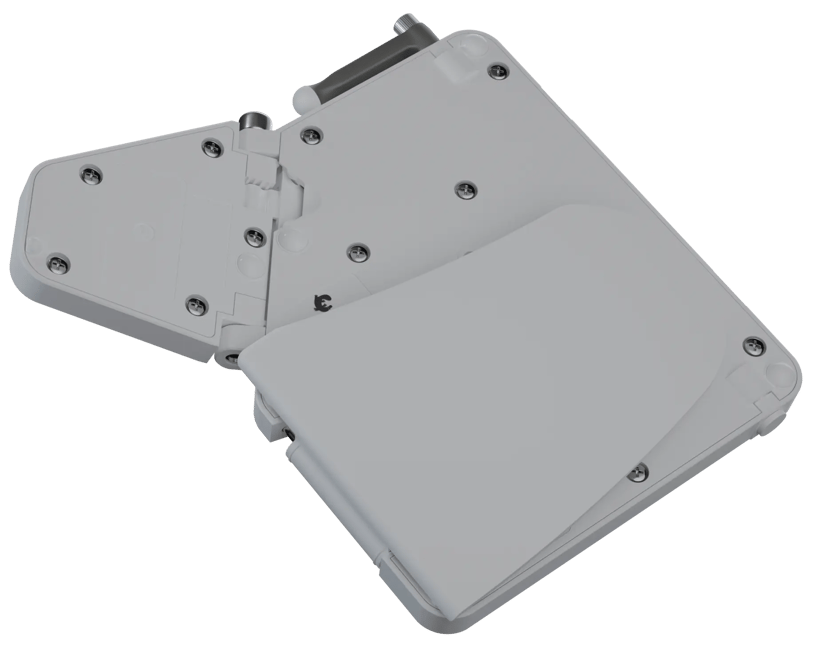
Folds for transport
When it‘s time to go, just fold the Wing under the Moonlander. It‘ll magnetically click into its stowed position.
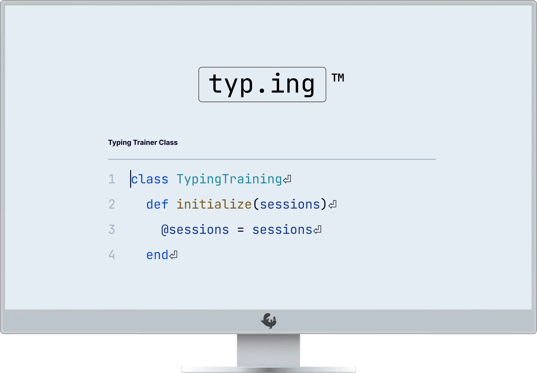
Learn by doing
It's deliberate practice, for typing. Connect your keyboard to our typing trainer for a live view with your practice. Includes everything you need to master your new keyboard layout and level up over time, for your own comfort and productivity nirvana.
Visit typ.ing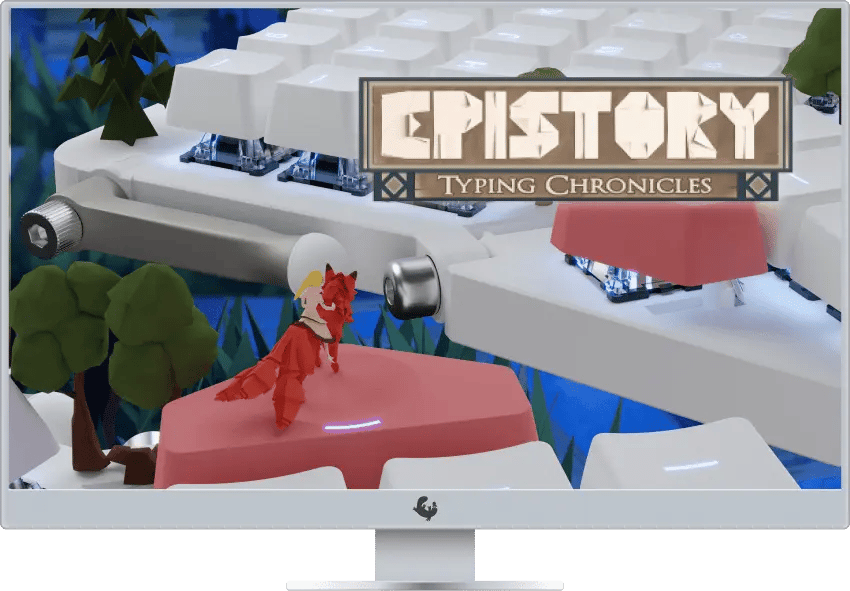
Learn by playing
Epistory: Typing Chronicles is an awesome game that will make you a better typist without you even noticing. Every Moonlander sold comes with a free, full license for Epistory.
See the game
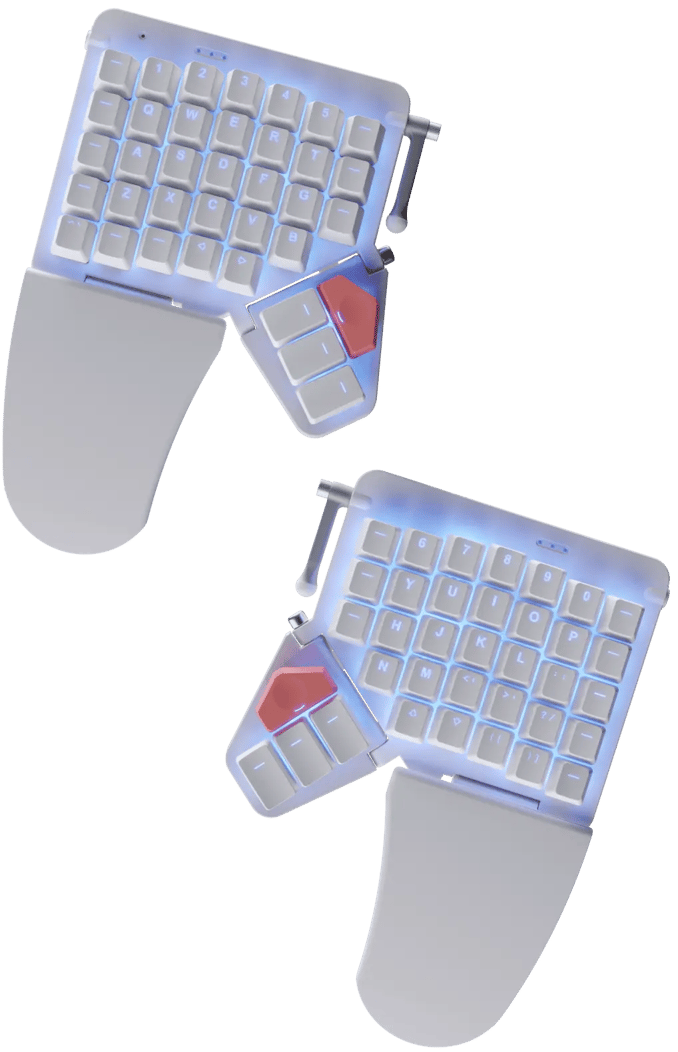
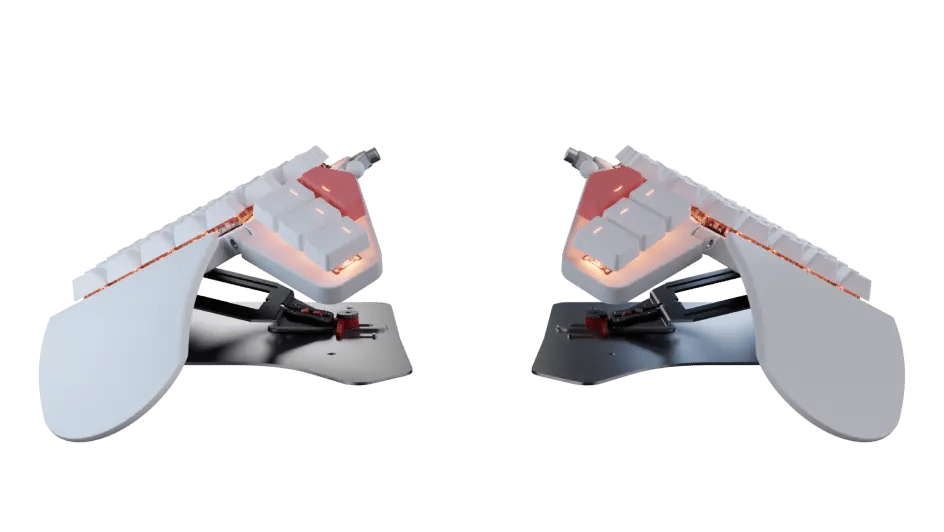
Modules that work
together
The thumb module tilts up and down. Use it to find the perfect typing angle, and the wrist support module will automatically follow.
That's a very smooth touchdown.
Thumb module
For small hands, tilt the thumb module up. For bigger hands, tilt it down.
A custom fit for your hand size.
The Launch and Any keys
You‘ll never have to hunt for these. Use them for things you do several times a day and that usually take multiple keypresses.
Switch your input locale or launch your password manager with a single tap of your index finger.
The piano keys
We designed these three easy-to-reach keys exclusively for the Moonlander, with a vertical profile and a dedicated backlight slot on each key.
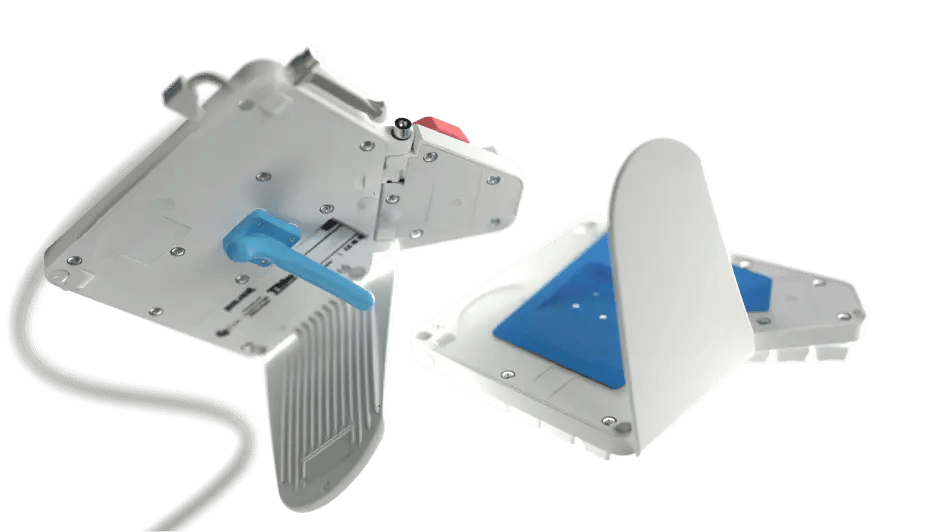
Wrist support module
Also known as the Wing, this is a comfy landing spot for your palm.
It automatically angles when you tent and tilt the keyboard, so it‘ll always be where you expect it.
Prefer typing without wrist support? The module is easy to detach, no tools needed.
Optional Modules
The Moonlander has a rich array of optional accessories.
Shrink down your Moonlander.Learn about the Zip Kit.
Suspend your Moonlander in space. Use a tripod to attach the board anywhere and adjust it to any angle.Learn more about the Tripod Kit.
A tenting system like no other.Learn more about The Platform.
A selection of 3D printable accessories made by the ZSA community. Make the board your own.Community Creations.
"Too many keys? No problem, you can remove the ones you don't need. Is your thumb too strong and you keep accidentally hitting a particular key? Take its switch out and replace it with a stiffer switch. Key caps not to your liking? No worries; the keyboard uses MX-style switches, meaning you have an entire world of custom keycaps available to you. Want to tent it? Want to use inverse tilt? Want to use tripod-style mounting gear? All perfectly valid options."
It fits you
No matter what size hands you have, the Moonlander's Thumb and Wing modules can be adjusted to accommodate you perfectly.
Download a life-size printable PDF, to try it out on your desk
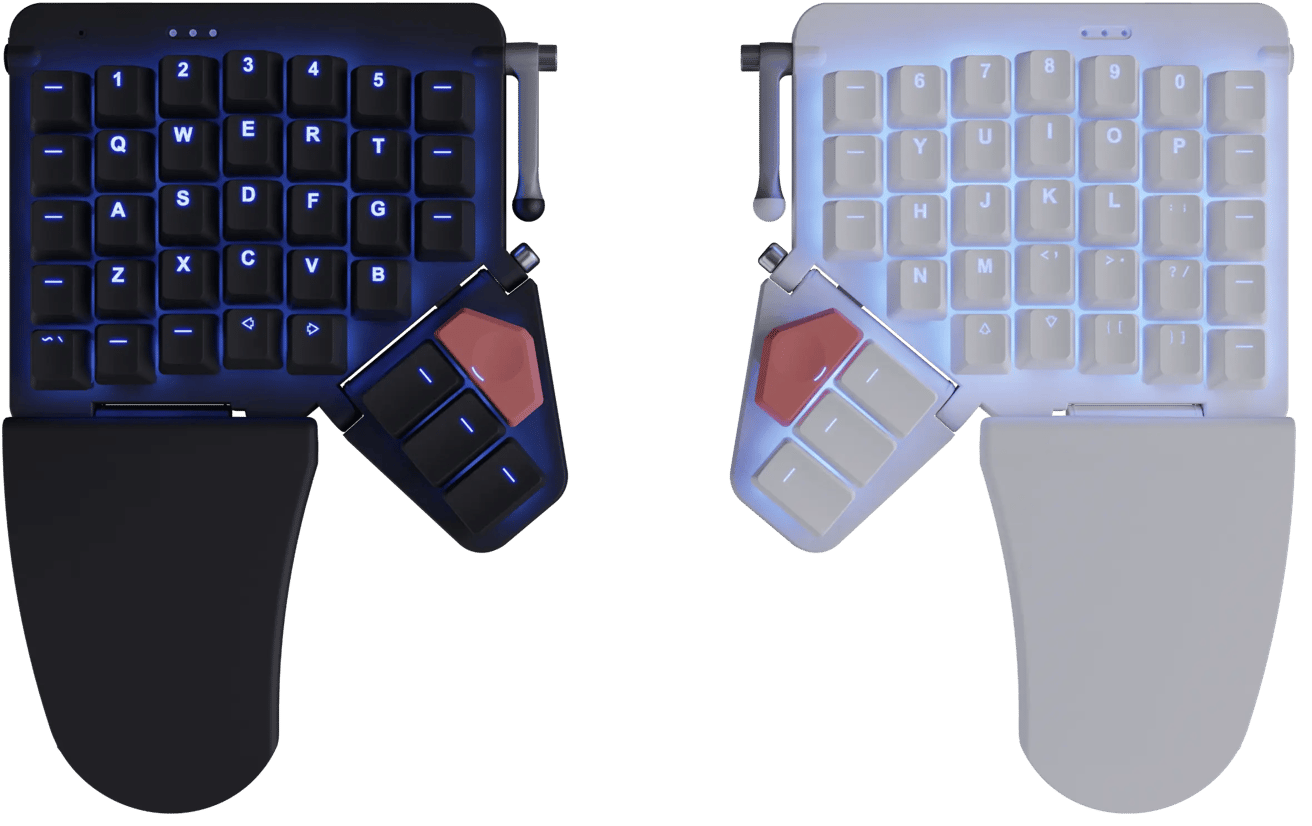
Comes in two colors
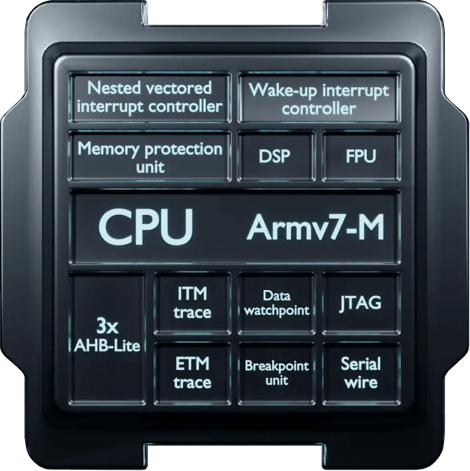
Powered by a Cortex-M4
The powerful ARM processor built into the Moonlander drives fluid LED animations and other demanding firmware features without breaking a sweat.
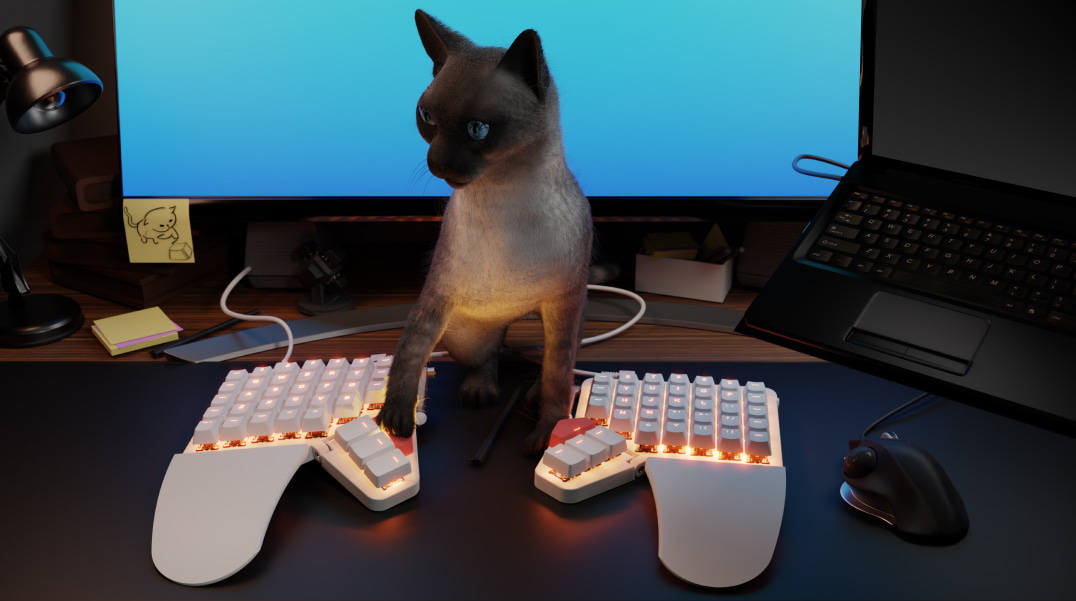
Feline-approved
A fully-customizable typing experience

Make your keyboard work just like you want it
You don't have to code to customize the Moonlander. Oryx is a free, simple, and powerful keyboard layout editor. Point-and-click your way to the ultimate in comfort and productivity.
Remap any key
Don't like where something is? Move it. All keys can be remapped and reassigned, and most people iterate over their layouts until they're just right.


Tap for A, hold for Ctrl
One key can do two, three, or even four things. Tap-dance and dual-function keys make it easy to hold a key for Ctrl (for example) and tap it to get the letter "A". All the power you need, within easy reach.

One-touch shortcuts
Want to set up a single key to send Cmd+S? Easy peasy.

Works with Mac, Linux, and Windows
All the "smarts" live on the board. No software or drivers required.

Unlock the power of system-wide hotkeys
Hyper is Ctrl+Shift+Alt+Win/Cmd, while Meh is Ctrl+Shift+Alt. No sane application on your machine uses these, which means you get free system-wide shortcuts.

Use multiple layers
With up to 32 layers, you can make a layer dedicated to your favorite game or app and get single-key access to helpful combos and shortcuts.

Open-source firmware
The powerful firmware that runs on the Moonlander is called QMK, and it's open-source, available on GitHub.
While you can use our configurator to quickly put together a layout, having complete access to the firmware source code means you can dig as deep as you'd like.
A thriving community
With thousands of people using our keyboards for all sorts of interesting things, there is never a lack of layouts to learn from. Some people even create layout tours to explain things better.


There's more: A galaxy of firmware features for you to explore and experiment with.
Made by people
you can trust
Makers of
We’ve been making high-end keyboards for years.
People seem to like them.
Uncompromising
2-year warranty
The Moonlander is a serious investment in your future well being, and our warranty policy reflects this. We proudly offer a two-year, no-BS, no fine-print warranty on our keyboards.
We also fully support the Right to Repair, and offer parts for all of our keyboards.