
Getting Started
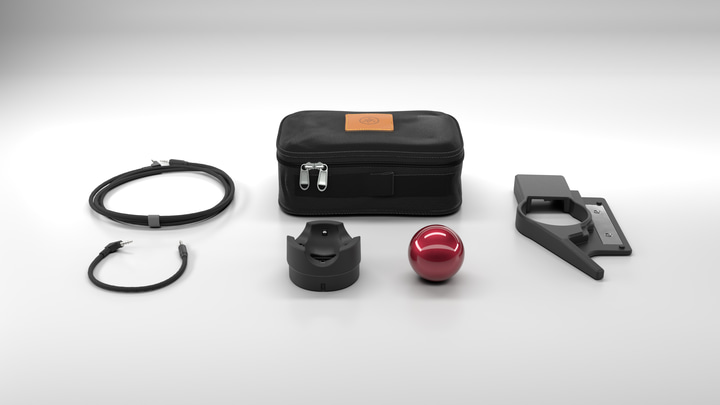
What’s in the box?
- Shell: Left, right, or none - depending on
your order. - Core: The Trackball.
- Cables: TRRS cables, one short and one long (not included with “Just the core”).
- Carrying Case: Custom made for the Navigator (not included with “Just the core”).
If you opted for “Just the core”, you will have the core only (no shell, cables, or carrying case).
Connecting the Navigator
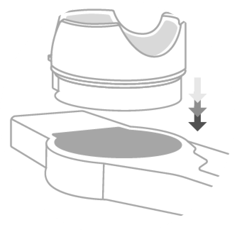
Gently push the module into the shell. It should just “pop” in, this doesn’t need force. You’ll know it’s in when you feel it click.
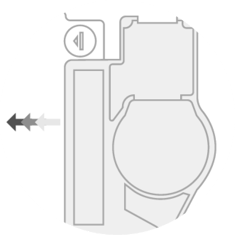
The Navigator attaches to the Voyager using magnets. Just bring the shell to the side of the Voyager, and it will snap right into place.
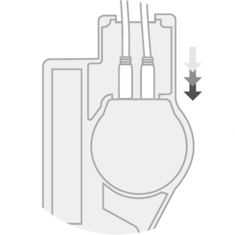
Turn the Voyager side with the Navigator over, and connect the two TRRS cables to the module. Plug the straight connectors in, and push firmly to make sure they are properly plugged in.
Note: The shorter cable goes in the port closest to the Voyager.
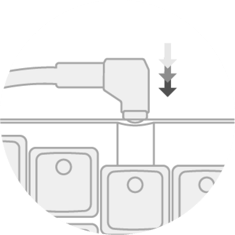
Connect the TRRS cables to the Voyager, using the right-angle connectors. Shorter cable goes to the Navigator connected side, longer one to the opposite. Then you can connect the USB-C cable to power on your keyboard.
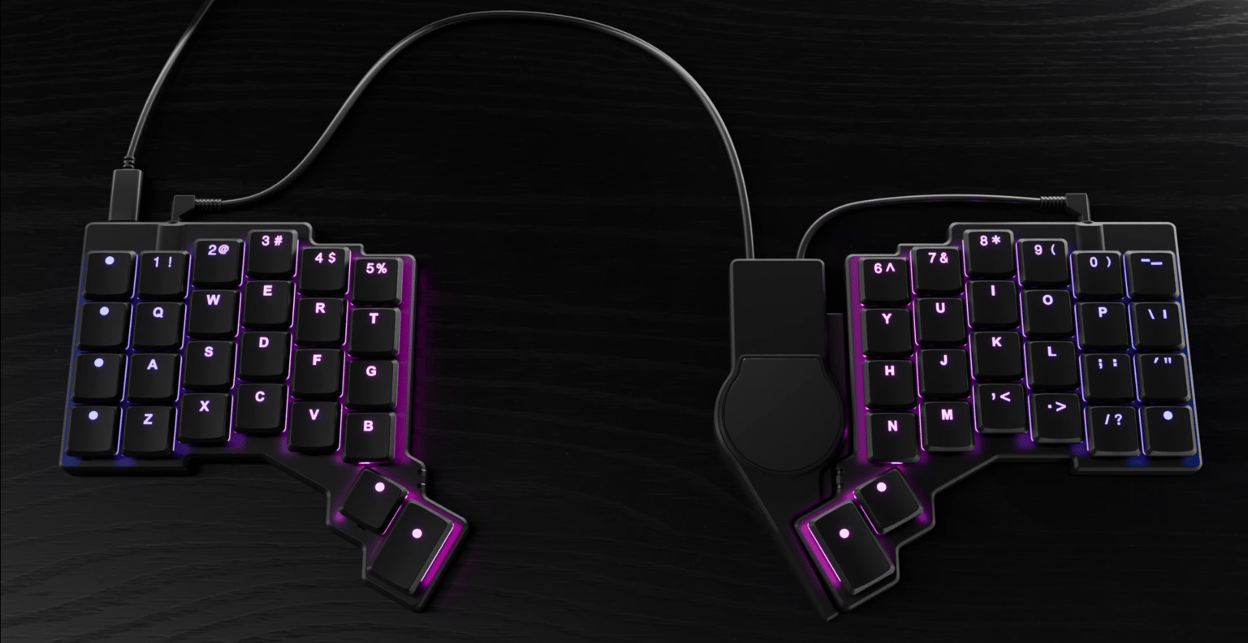
The final look. Your Voyager is almost ready to mouse!
Configuring the modules
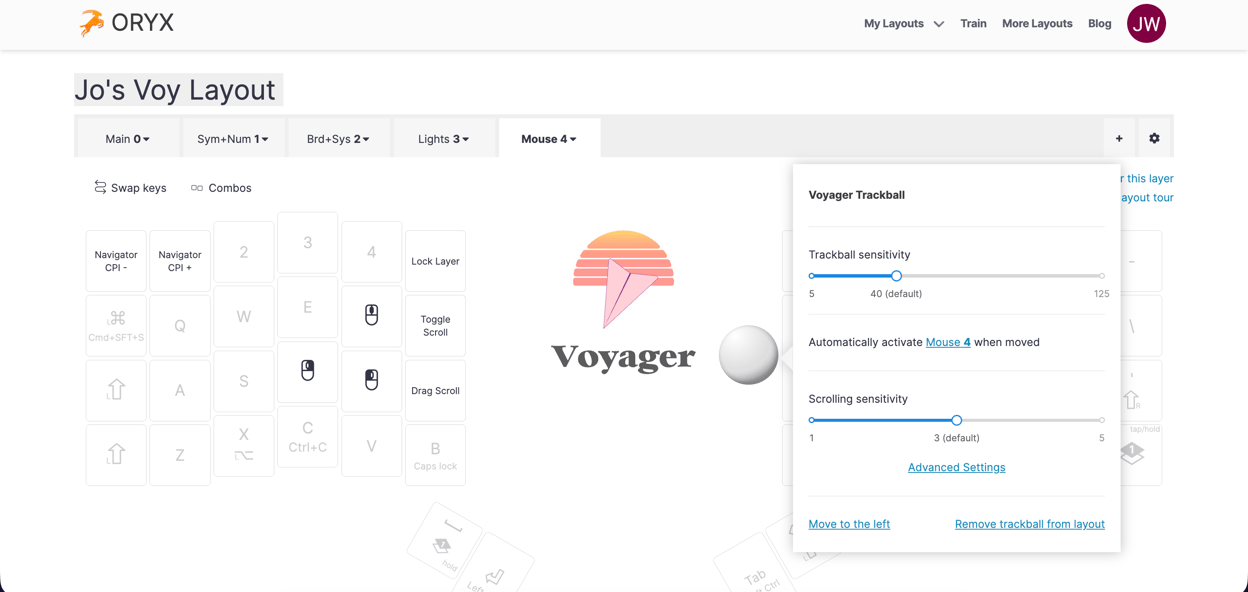
The first time you plug in your Navigator, the module will not respond. We’ll need to modify the Voyager’s layout, add a Navigator with one of the plus icons, then compile and flash the new layout to the board.
You’ll do this in Oryx as shown in the video below.
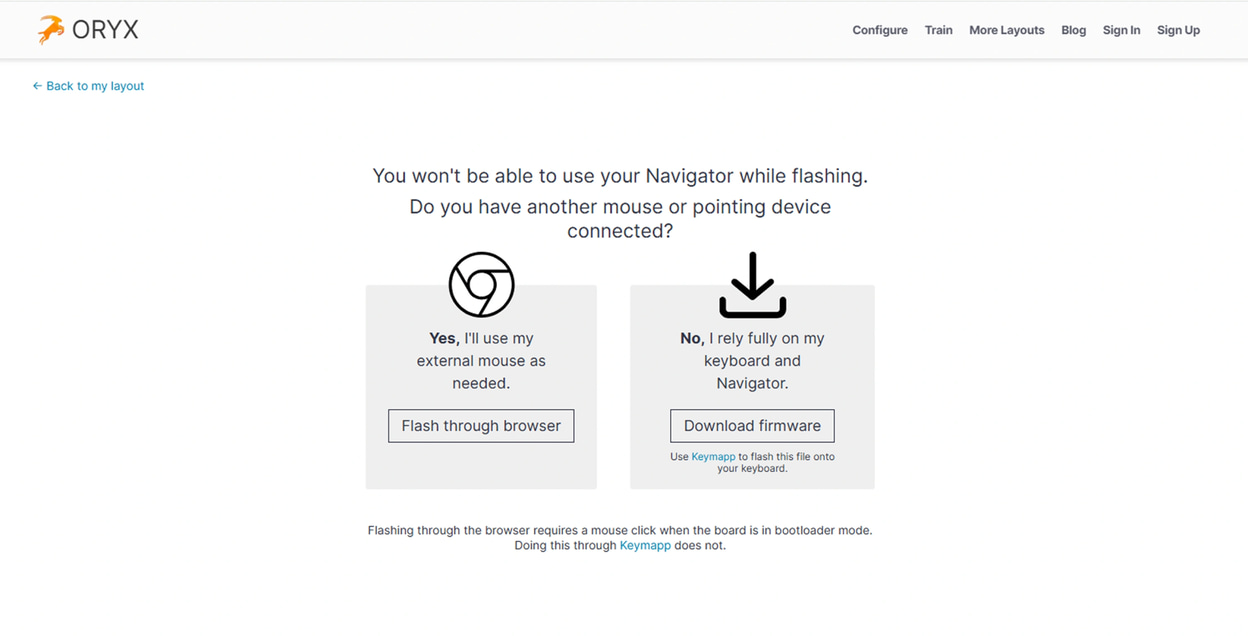
When flashing your keyboard through Chrome, you will need an external mouse connected. This isn’t needed when flashing through our Keymapp tool.
Getting used to your Navigator
Transitioning to the Navigator Trackball or Trackpad takes practice. Don’t throw out your mouse just yet! It will take time to get comfortable with the Navigator and find what settings work for you. Be patient with yourself while you get used to everything.
Remember that you don’t need to fully switch right away. Some movements and actions may feel frustrating and slow at first. It’s completely okay to keep your regular mouse by you so you can switch back and forth. Over time, you’ll find yourself using the Navigator more and more often.
Navigator Keys
When adding a Navigator, you will have access to a new selection of Navigator keys to assign in your layout. You can see all of these by searching for “Navigator” when assigning a key in Oryx.
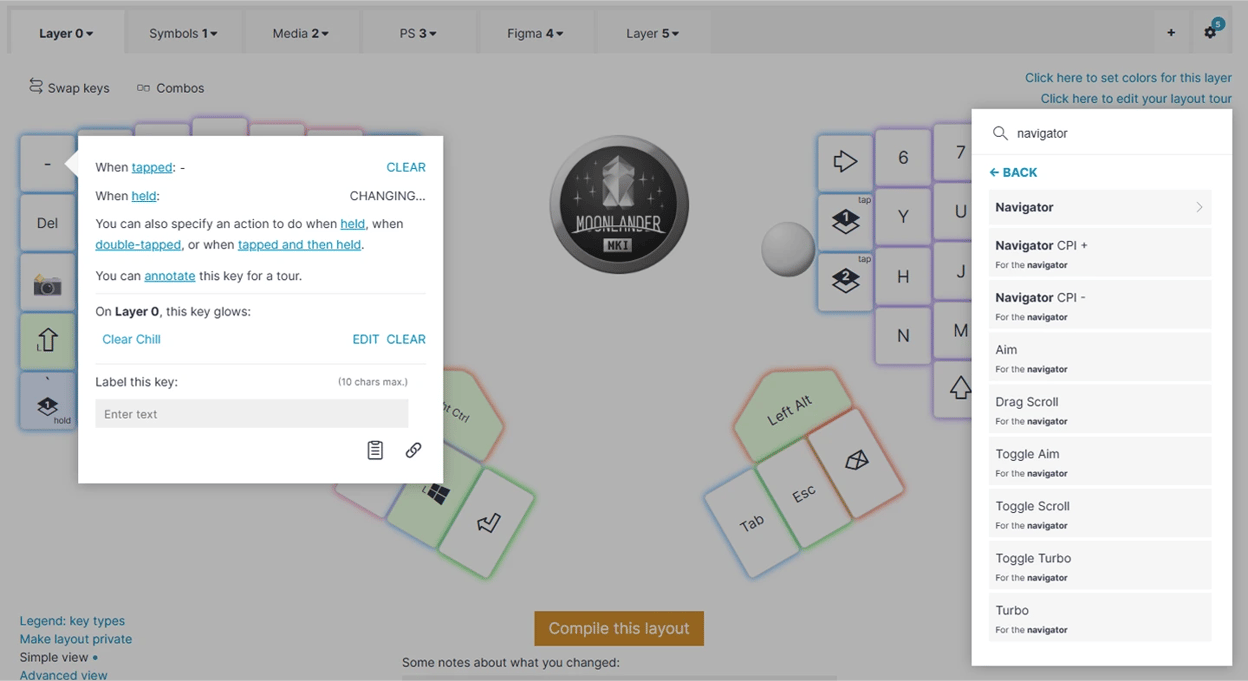
Here are a few of the important Trackball keys to know as you get started:
Drag Scroll and Toggle Scroll turn your Trackball into a scroll wheel while you hold or tap these keys respectively.
Aim and Turbo dramatically reduce or raise your cursor speed respectively while you hold these keys. There are also toggle keys if you prefer to tap instead of hold. If you ever lose track of whether Aim or Turbo are active, Clear Speed resets your cursor speed back to the default speed you set in your layout’s settings (not the out-of-the-box default).
CPI+ and CPI- raise and lower your base cursor speed by a little bit each time you hit them. These changes are cleared when the keyboard is powered off, so these keys are best used early on while experimenting to find what feels good.
Navigator settings
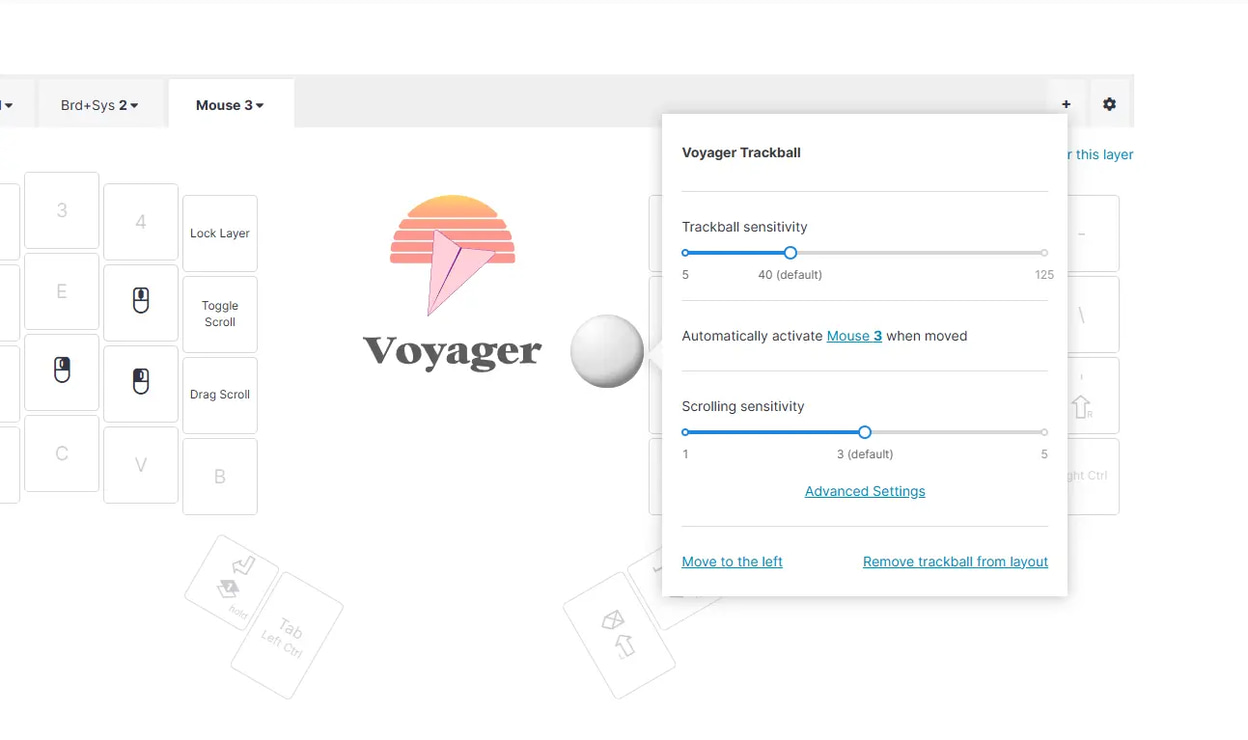
A few core settings can be found by clicking on the Navigator in Oryx.
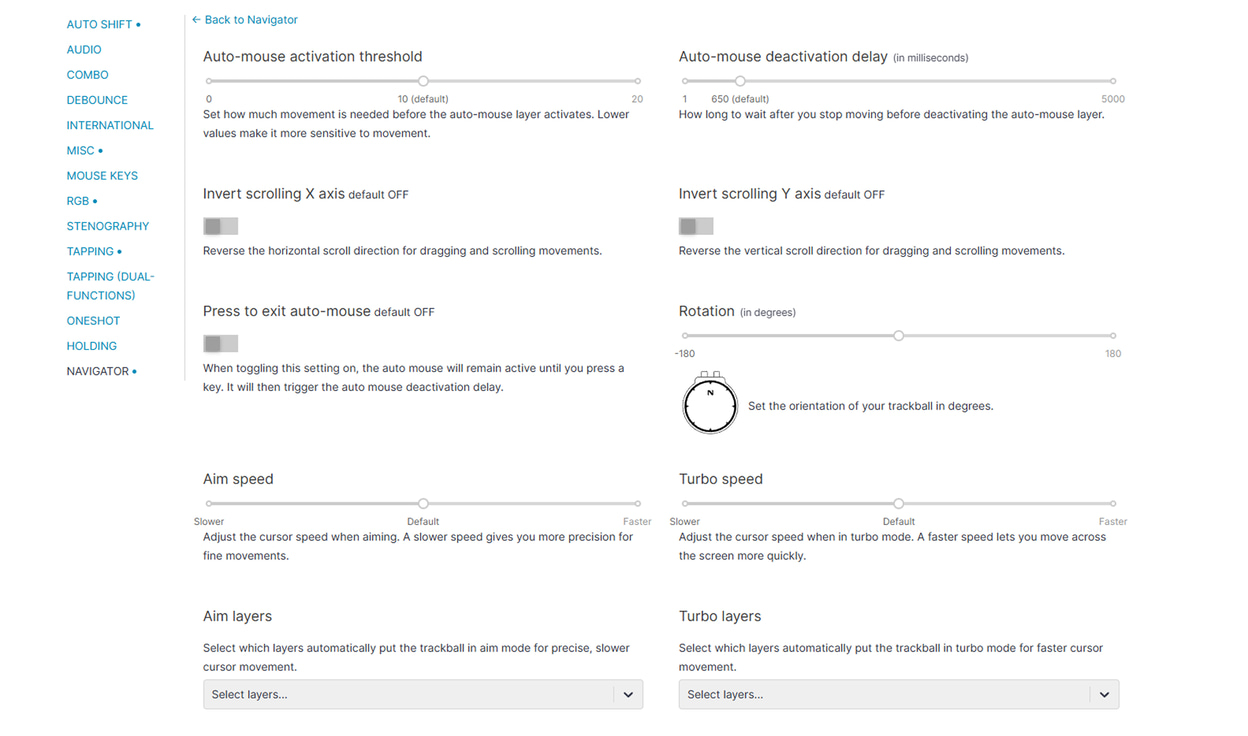
The rest of the Navigator settings are in the Navigator tab of your layout’s advanced settings.
Getting Started with the Trackball
This video provides a quick overview of the Navigator Trackball keys and advanced settings. This is also explained in the text below, but if you prefer watching, this is a good place to start.
The auto-mouse layer for the Trackball
By default, the Navigator Trackball adds a Mouse layer to your layout that activates when you move the mouse and deactivates after a set period of time, the Auto-mouse deactivation delay. There are quite a few ways you can set up your auto-mouse layer, or even not use one at all. Experiment with the defaults first, and if you want to change things, check out our deep dive into the auto-mouse feature on our blog.
Trackball Settings
Enabling Press to exit auto-mouse gives you a different way to use the auto-mouse layer. This mode toggles your auto-mouse layer on when you move the mouse, then waits to deactivate it until you’ve pressed a key (it’ll count down your Auto-mouse deactivation delay once you’ve pressed a key.)
You can invert the scroll direction of either axis, either in firmware through Oryx or in your operating system settings. Doing this in Oryx makes sense if you only want this to apply to the Navigator (that way any other mice on your computer will still scroll like they always have).
Raising Auto-mouse activation threshold can help if you are a particularly heavy typist or use the Trackball at a high tenting angle and notice the mouse layer activating while you type.
Setting the Rotation of your Navigator Trackball is useful if you plan to use a 3D-printed shell that changes the orientation of the Trackball, such as our thumb shell.
The Aim Speed and Turbo Speed settings change the degree these keys reduce or raise your cursor speed respectively.
The Aim layers, Turbo layers, and Drag Scroll layers settings allow you to make it so activating certain layers will automatically turn these modes on. There are lots of ways to use this, but here are a couple of common configurations you can try to get started:
- Instead of using the auto-mouse layer, you can experiment with switching to your mouse layer manually (with a thumb key, for example) and set your mouse layer to activate Aim automatically while raising your base cursor speed. This makes mousing around most of the time nice and speedy while slowing down your cursor as you get ready to click.
- If you have a layer you already use that you don’t need to move your cursor while using (maybe a Symbol layer, for example), you can set that layer up to activate Drag Scroll automatically. This gives you a way to turn your Trackball into a scroll wheel from your base layer without needing to find a separate place to put a Drag Scroll key. You can make a layer-switch you’re already using do two things.
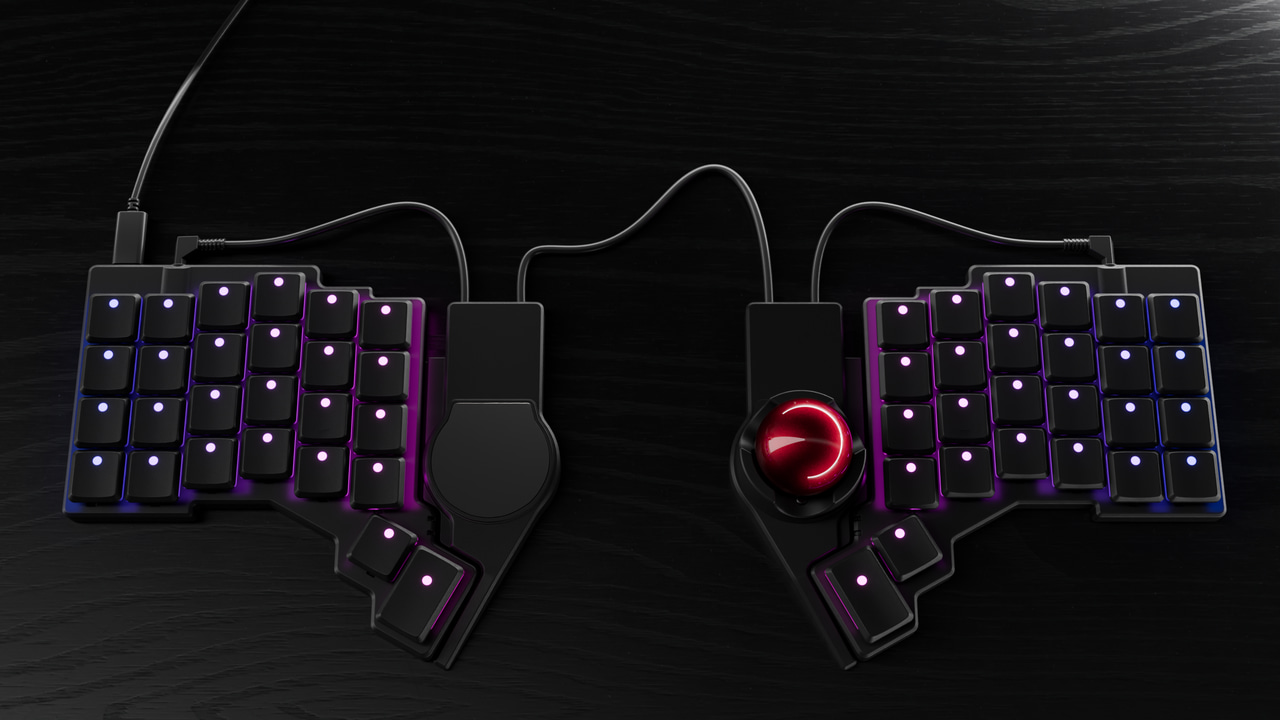
Using two Navigators at once
If you would like to use both a Trackball and Trackpad at once, you can! Add them to your layout in Oryx just like you would add a single Navigator.
A note about cables
For the best experience using this configuration, you will probably want a different cable that connects the two Navigators in the center. All of the cables we offer end in a 90 degree connector on one or both ends, but connecting two Navigators together requires a TRRS cable with a straight connector on both sides. We may offer this cable variant officially later, but for now, this is something you will have to get from a third-party. Fortunately, this is the most common type of TRRS cable, so it should be easy to find.
We recommend going with a reputable brand available locally to you — it shouldn’t be very expensive. Make sure that you’re getting a TRRS cable and not a TRS cable, too. These two cables look similar but only TRRS will work. If you’re not sure, just email us and we can point you in the right direction.
Auto-mouse layers and settings
Each Navigator has independent settings, so you’re free to set them up to work the same or (more likely) differently depending on what you want to do. You can even have two different Mouse layers, one for each Navigator.
Travelling with the Navigator
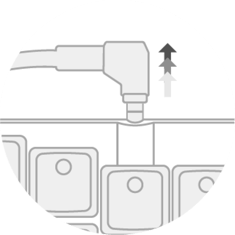
Unplug your Voyager’s USB-C cable, then disconnect the TRRS cables: first from the Voyager, then the Navigator.
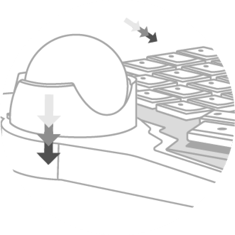
The Navigator attaches to the Voyager using magnets. To disconnect, gently but firmly push the Navigator down and away from the Voyager.
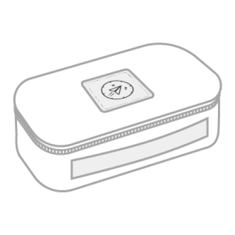
Into the carrying case it goes. We’ve sized the carrying case generously so the Navigator fits comfortably along with the cables. Zip up the high-quality YKK zipper, chuck it in your bag, and you’re ready to go.
Still have a question?
Robin, Nick, Mike, and Erez are here to personally help you. Please email us and we’ll get back to you promptly — it is important for us that you have a great experience with your Navigator. ❤
contact@zsa.io